Tutorial: How to use the SCION Registry
SCION networks are required to use globally unique numbers to identify Isolation Domains (ISDs), and it is operationally desirable to use globally unique numbers to identify SCION Autonomous Systems (ASes). ISDs are identified with a 16-bit number, whilst SCION ASes are identified by a 48-bit number.
ISD and SCION AS numbers are assigned and registered by the SCION Registry in order to ensure global uniqueness. This is operated by the SCION Association on behalf of the SCION community, in accordance with the SCION Registry Policy and governed by the Registry Committee.
The SCION Registry records ISD and SCION AS number assignments, the organizations or individuals who have been assigned ISD and/or SCION AS numbers (known as ‘Resource Holders’), and the details of the roles and/or persons who are the administrative and technical contacts for the Resource Holders. The SCION Registry portal allows Resource Holders to assign, update and remove contact information, as well as request ISD and SCION AS numbers. It is also possible for a Resource Holder to assign another organization to manage resources on their behalf, such as in scenarios where their network management is outsourced.
This tutorial outlines how to create an account for your organization, assign administrative and technical contacts, and request ISD and SCION AS numbers.
Creating your account
The SCION Registry portal can be found at https://registry.scion.org
Step 1:
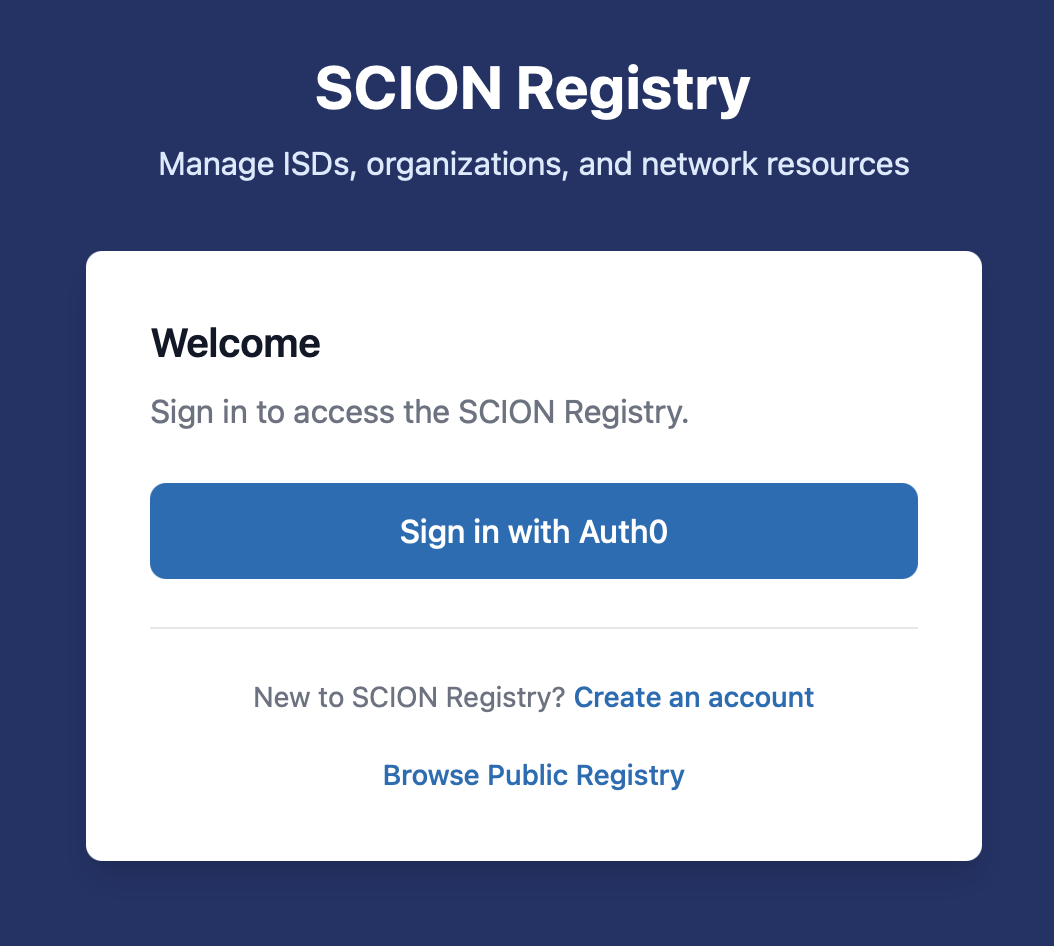
Select ‘Sign in’ on the portal menu.
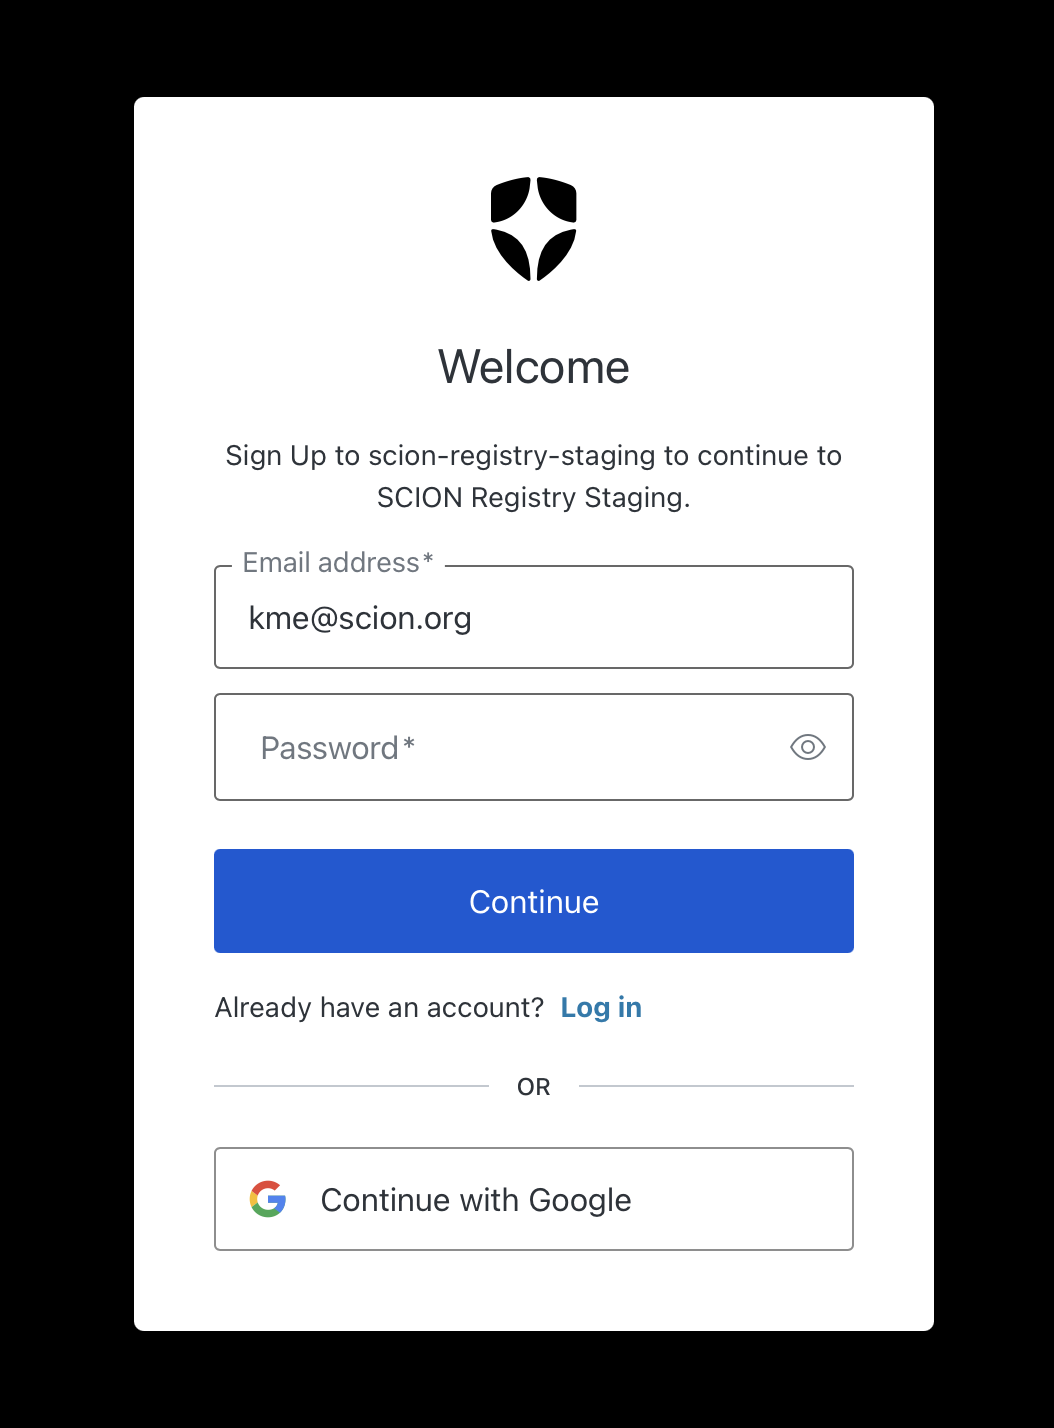
If you don’t already have an account, then click on ‘Create an account’. Enter the email address and password that you wish to use as your personal login. You can later create other personal accounts and role profiles and assign them permissions to manage your SCION number resources and organizational details.
Alternatively, if you have a Google account, you may use this to sign-in.
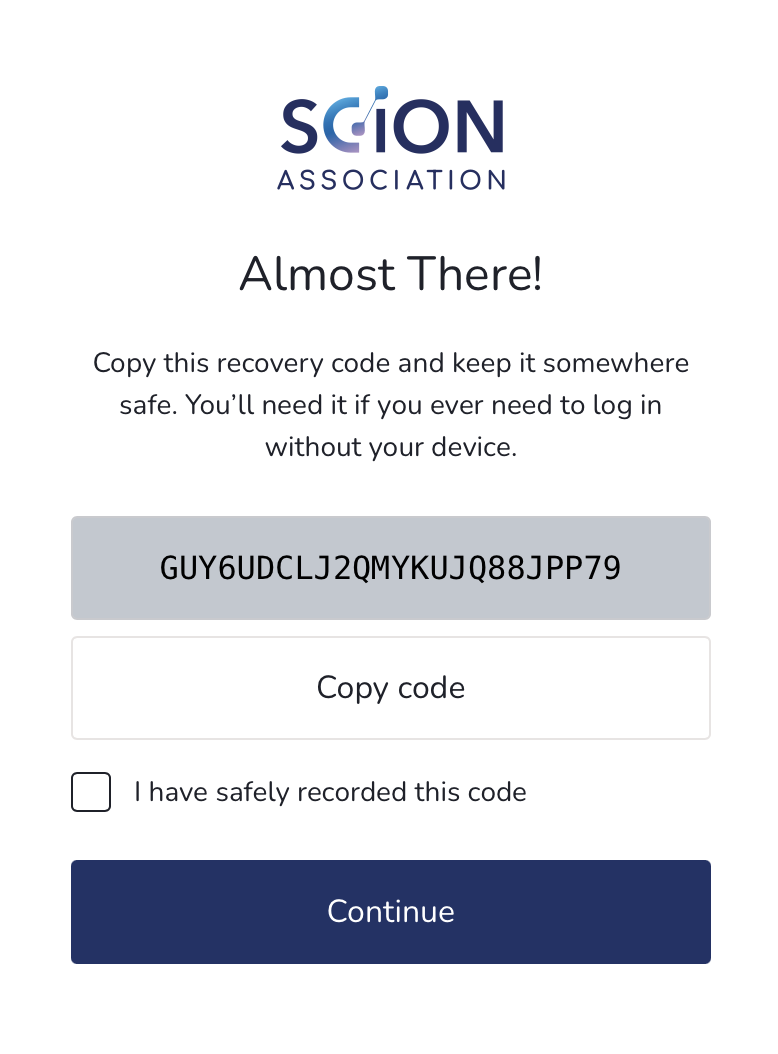
If you’re creating an account, you’ll then be asked to secure it by generating a two-factor authentication code. Scan the QR code using your preferred authenticator app, and then enter the provided one-time code:
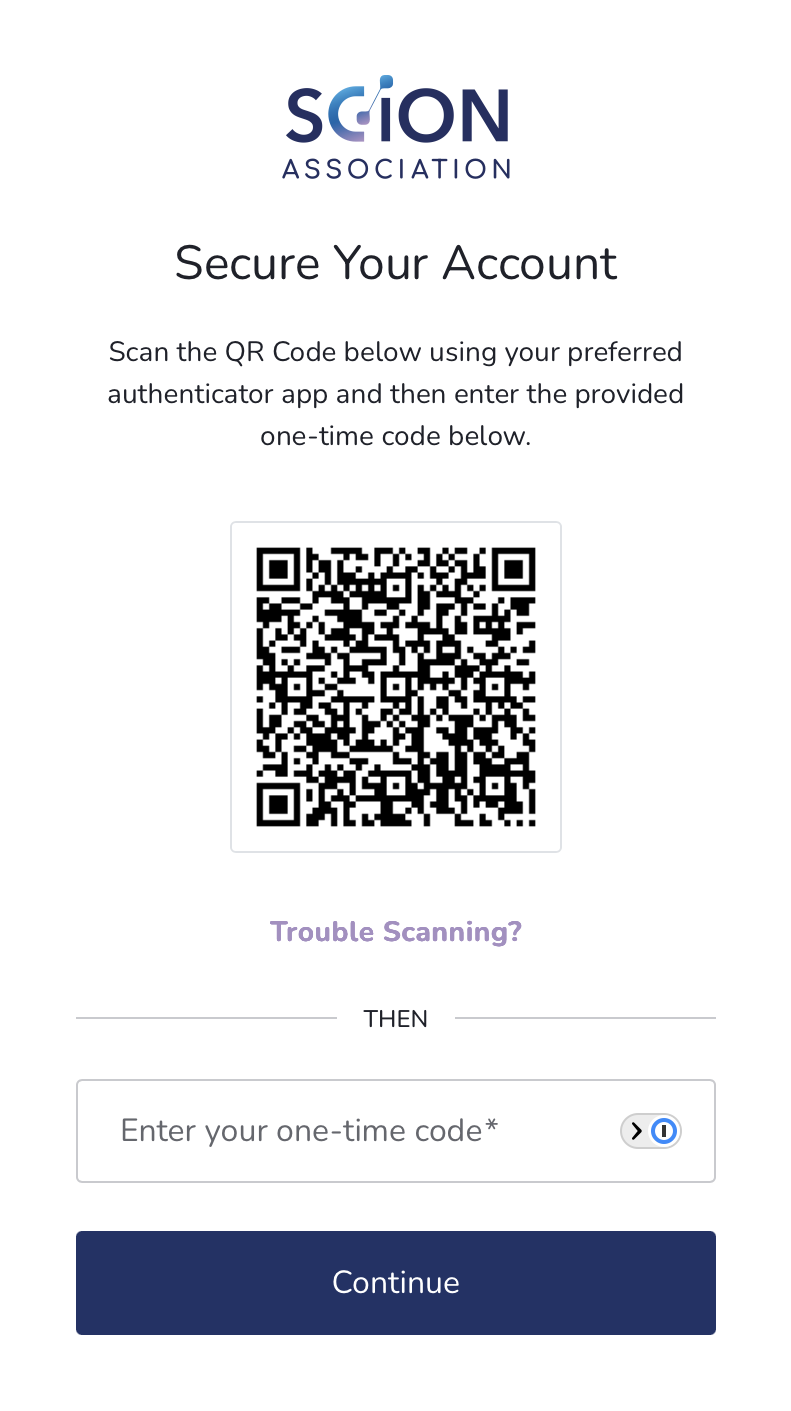
Make a note of the recovery code as this will be needed if you ever need to log in without your authenticator app.
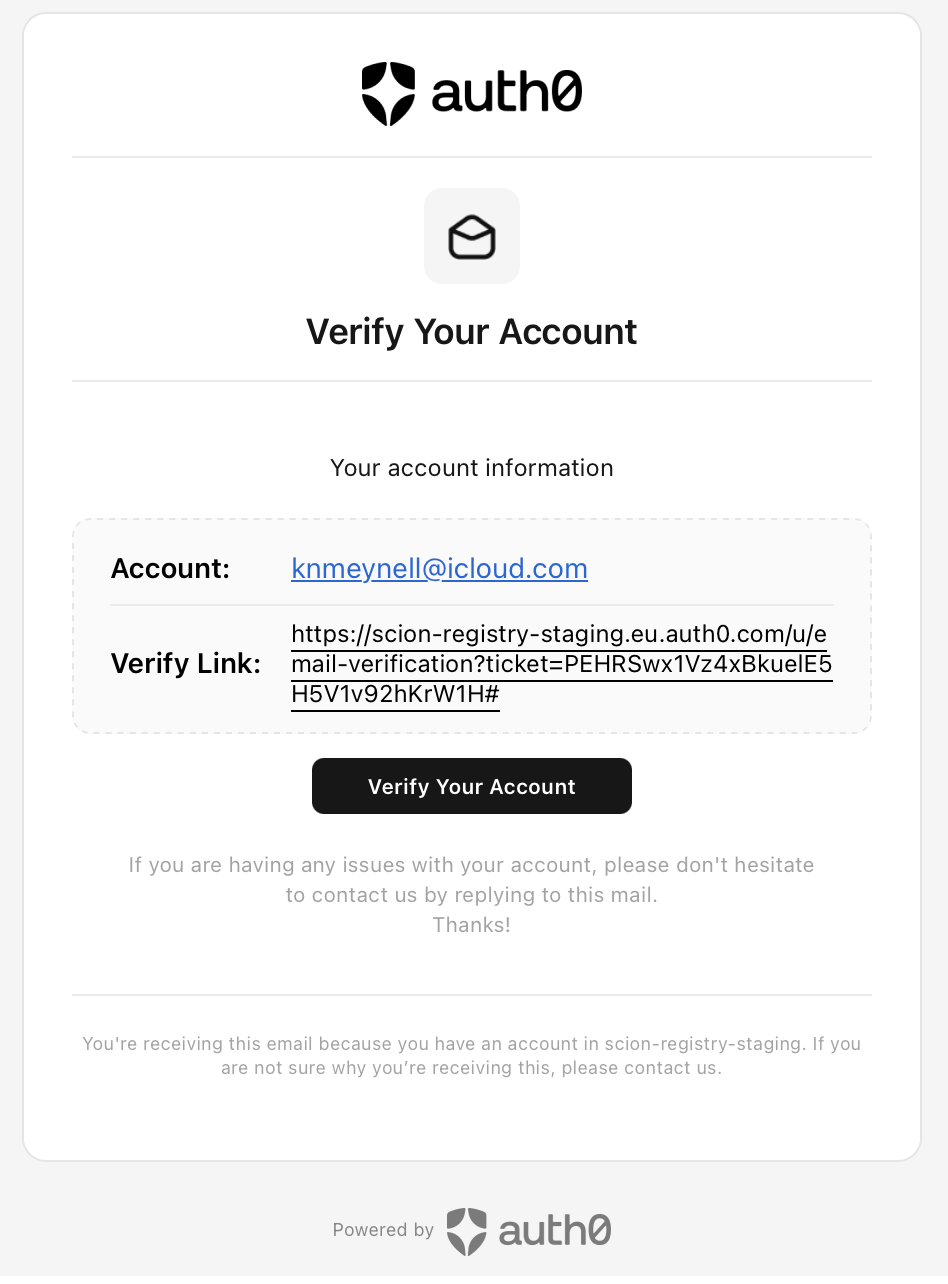
You will also be sent an email to the email address you provided, asking you to verify it by clicking on ‘Verify link’ in the email:
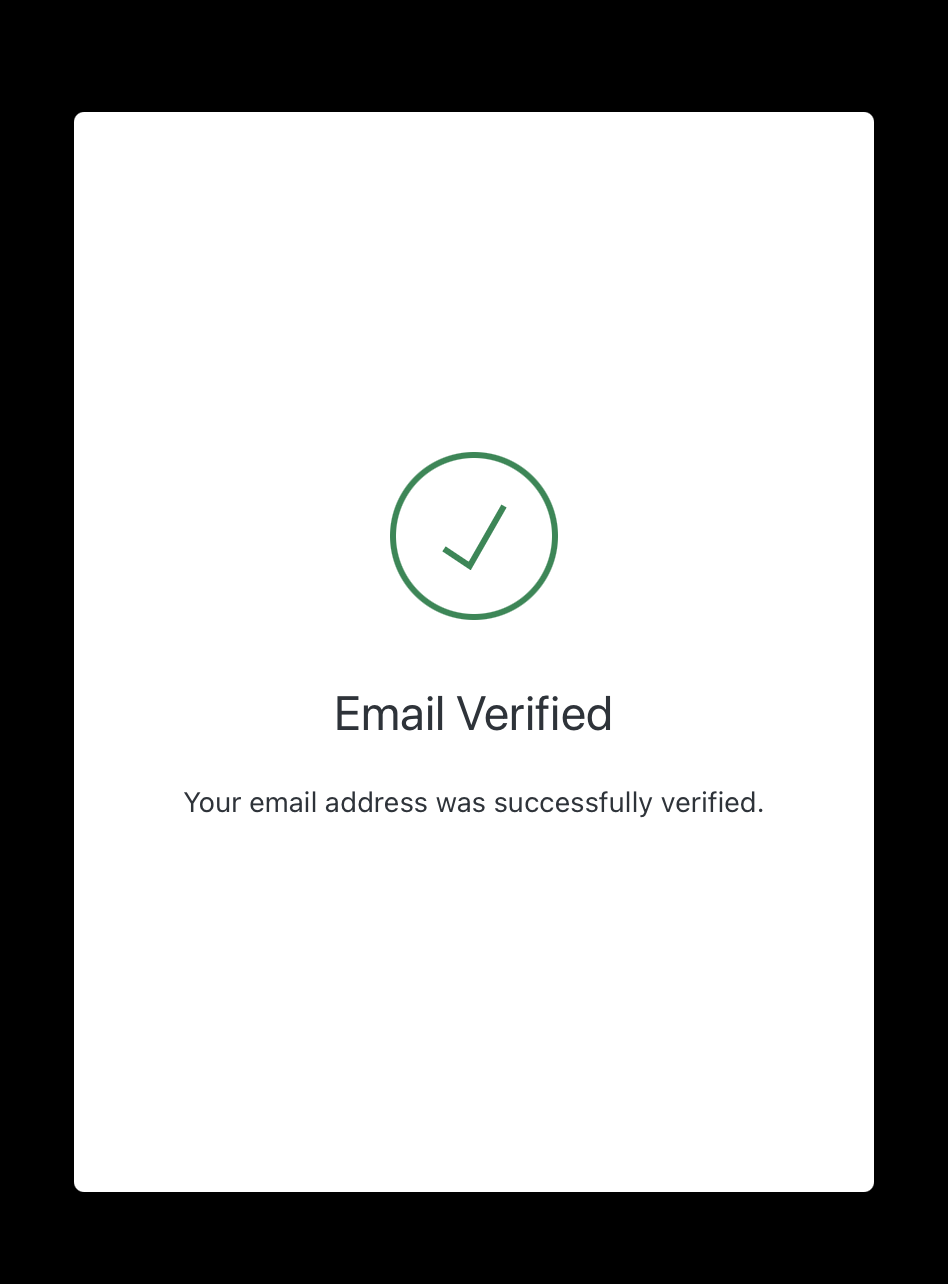
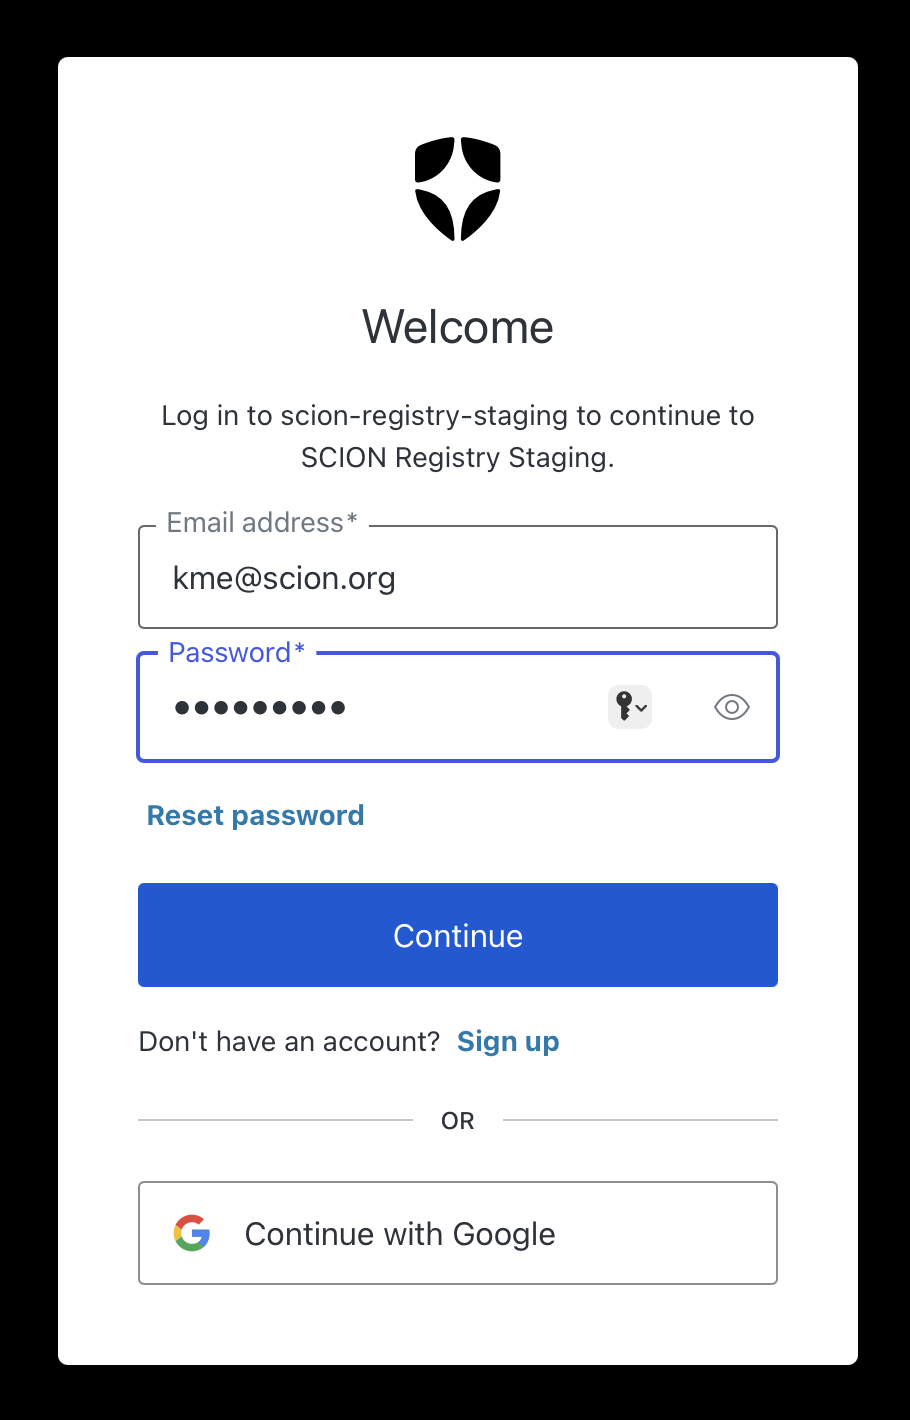
Return to the login screen, enter your email address and password, and click ‘Continue’:
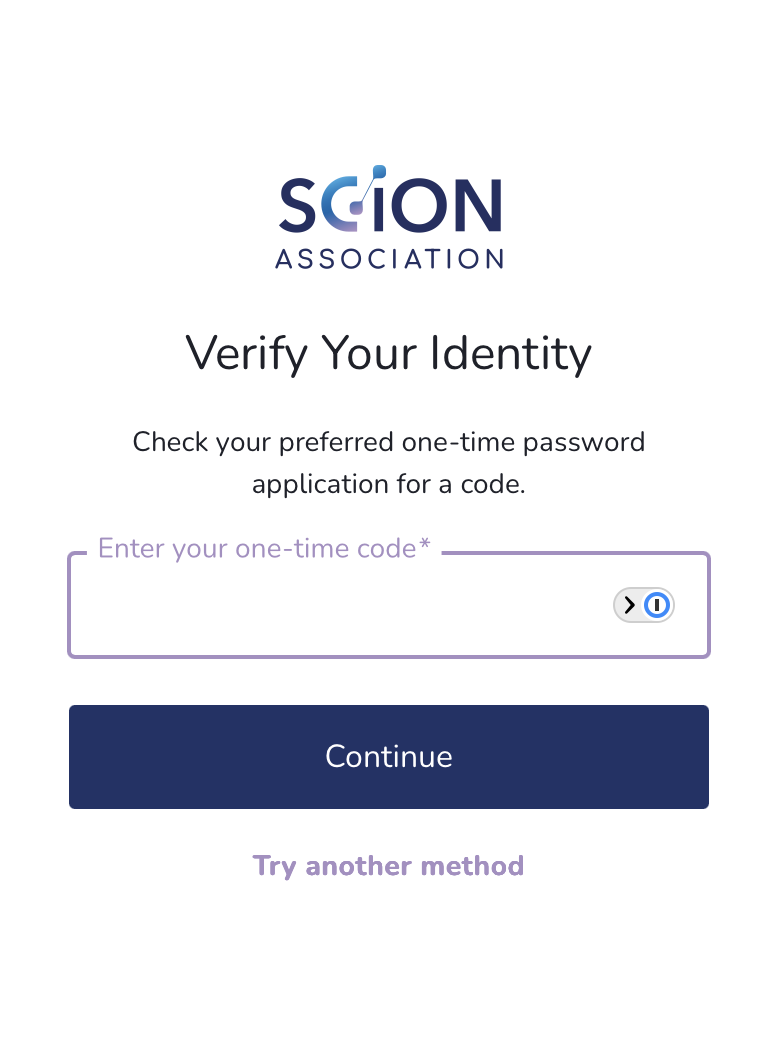
Verify your identity with the one-time code shown in your authenticator app:
Step 2:
Upon successful login, you can now complete and submit your Personal profile and enable two-factor authentication. Please note that your personal information will not be displayed on the public registry website.
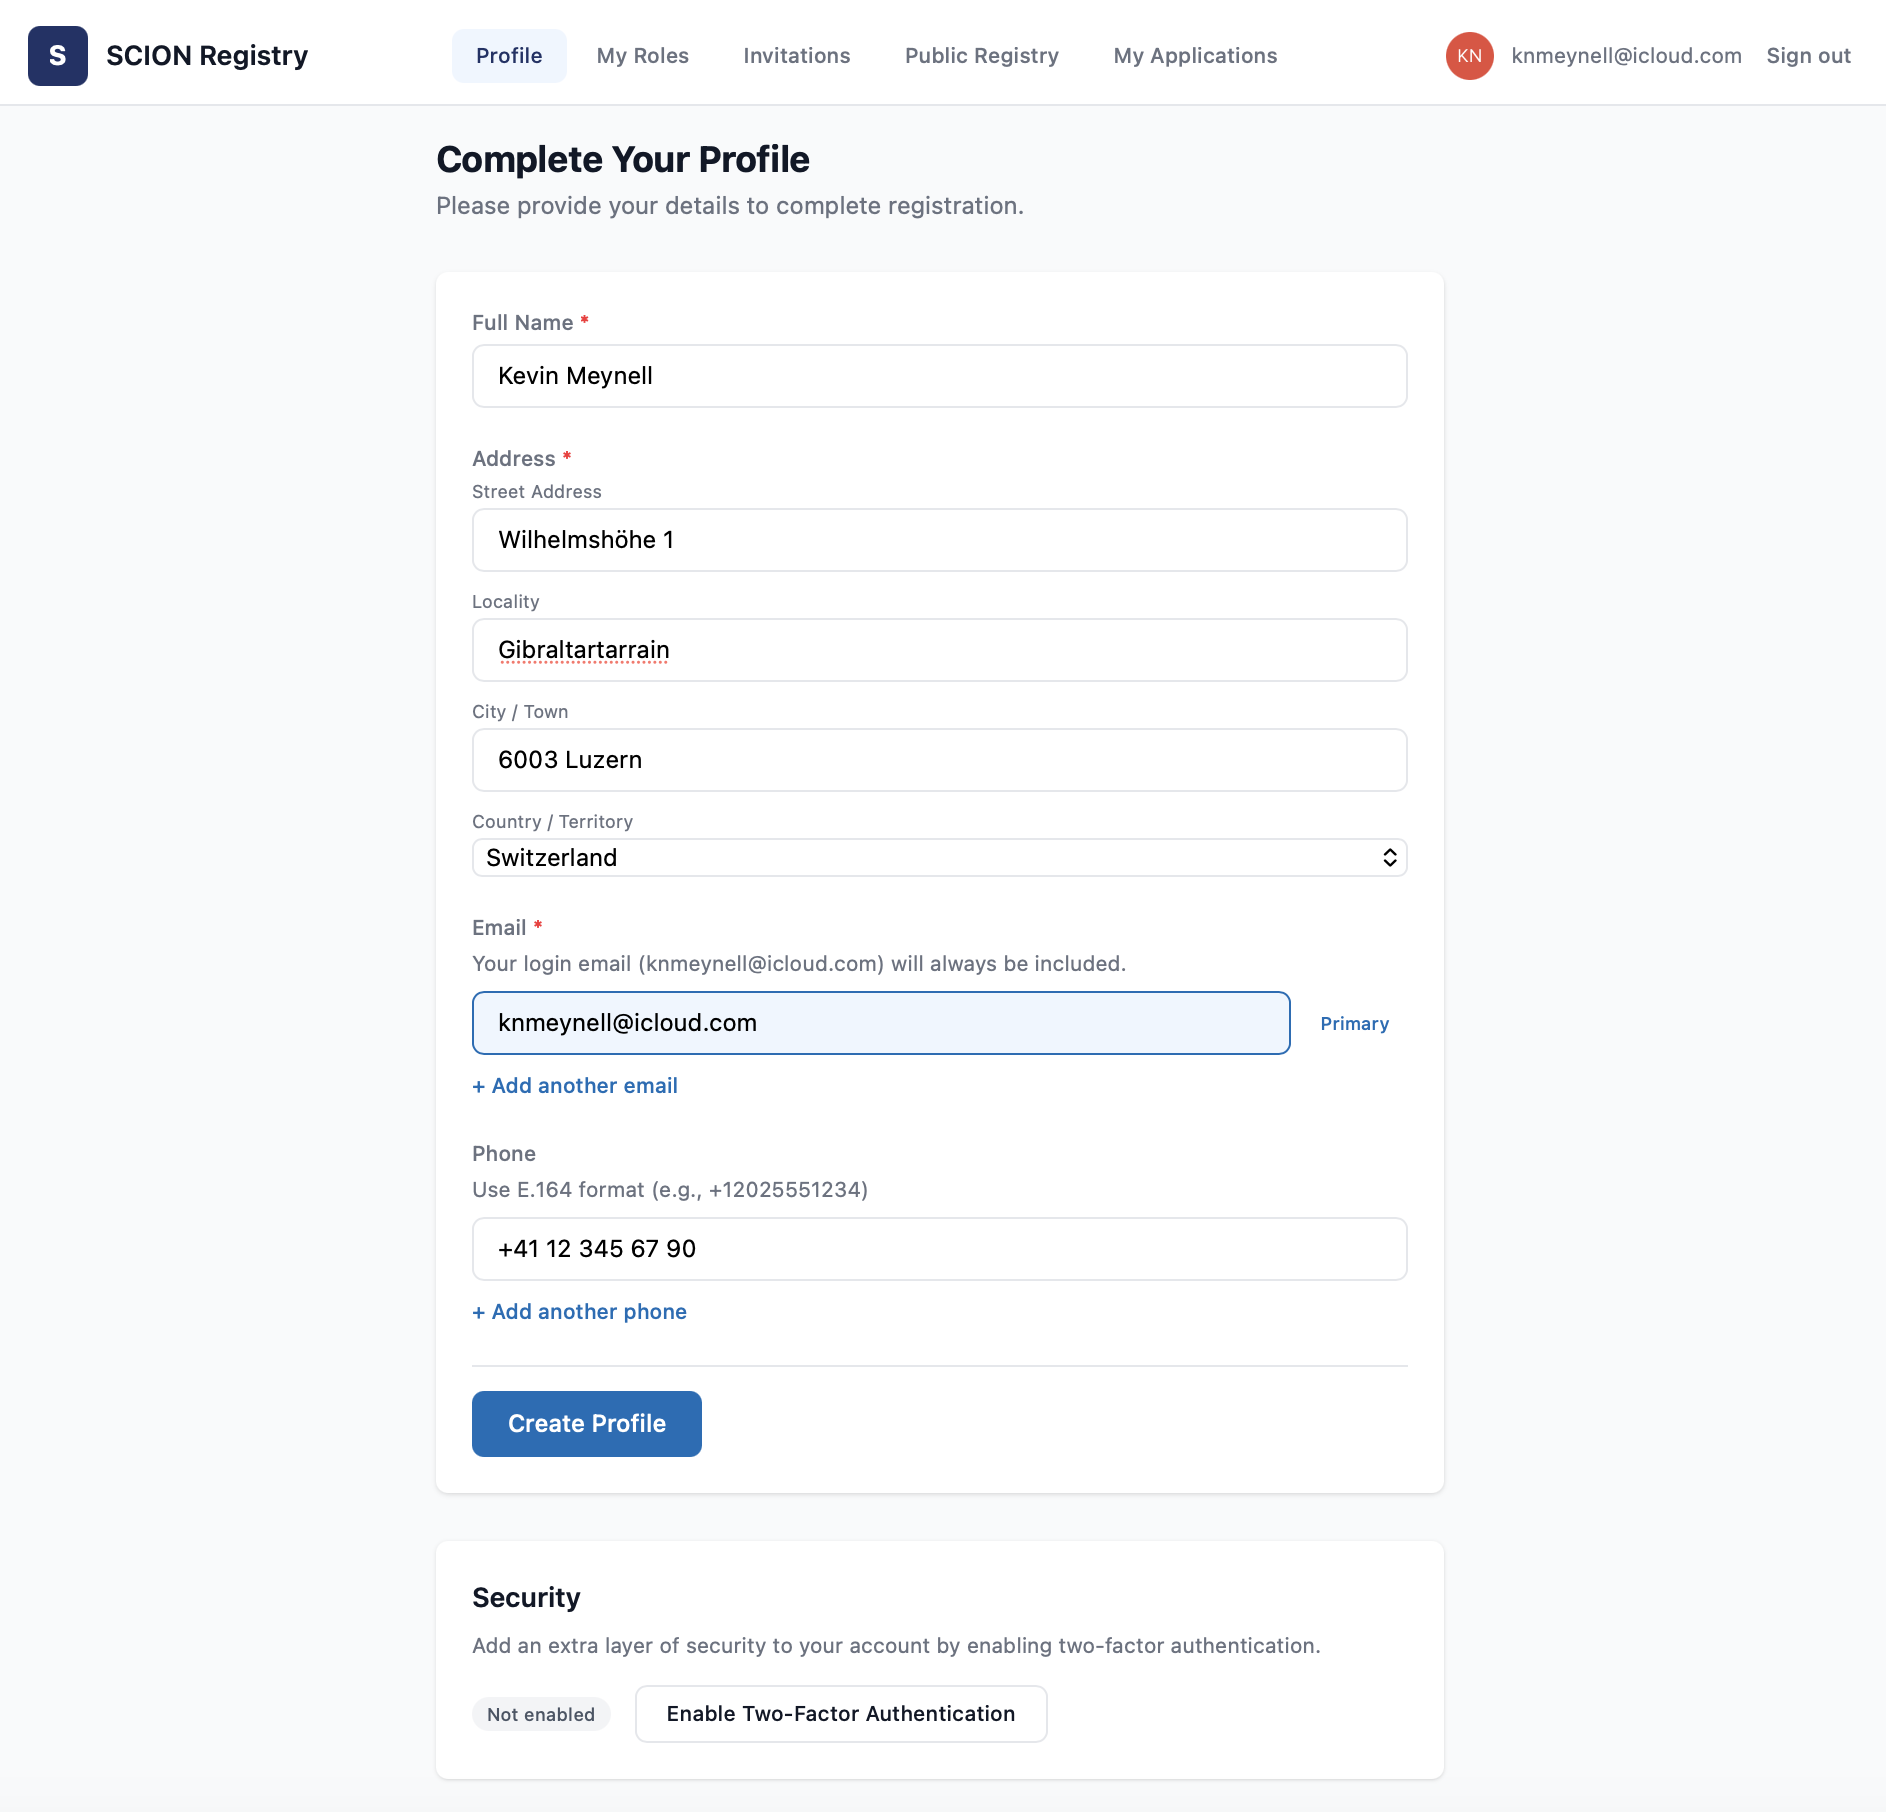
Once your personal Profile has been created, you will be assigned a NIC handle (e.g. PERS-KM2-SCION). You can return to your profile and edit it from My Applications in the top menu.
Step 3:
The next step is to create your Organization profile. Click on My Activity then Applications in the top menu:
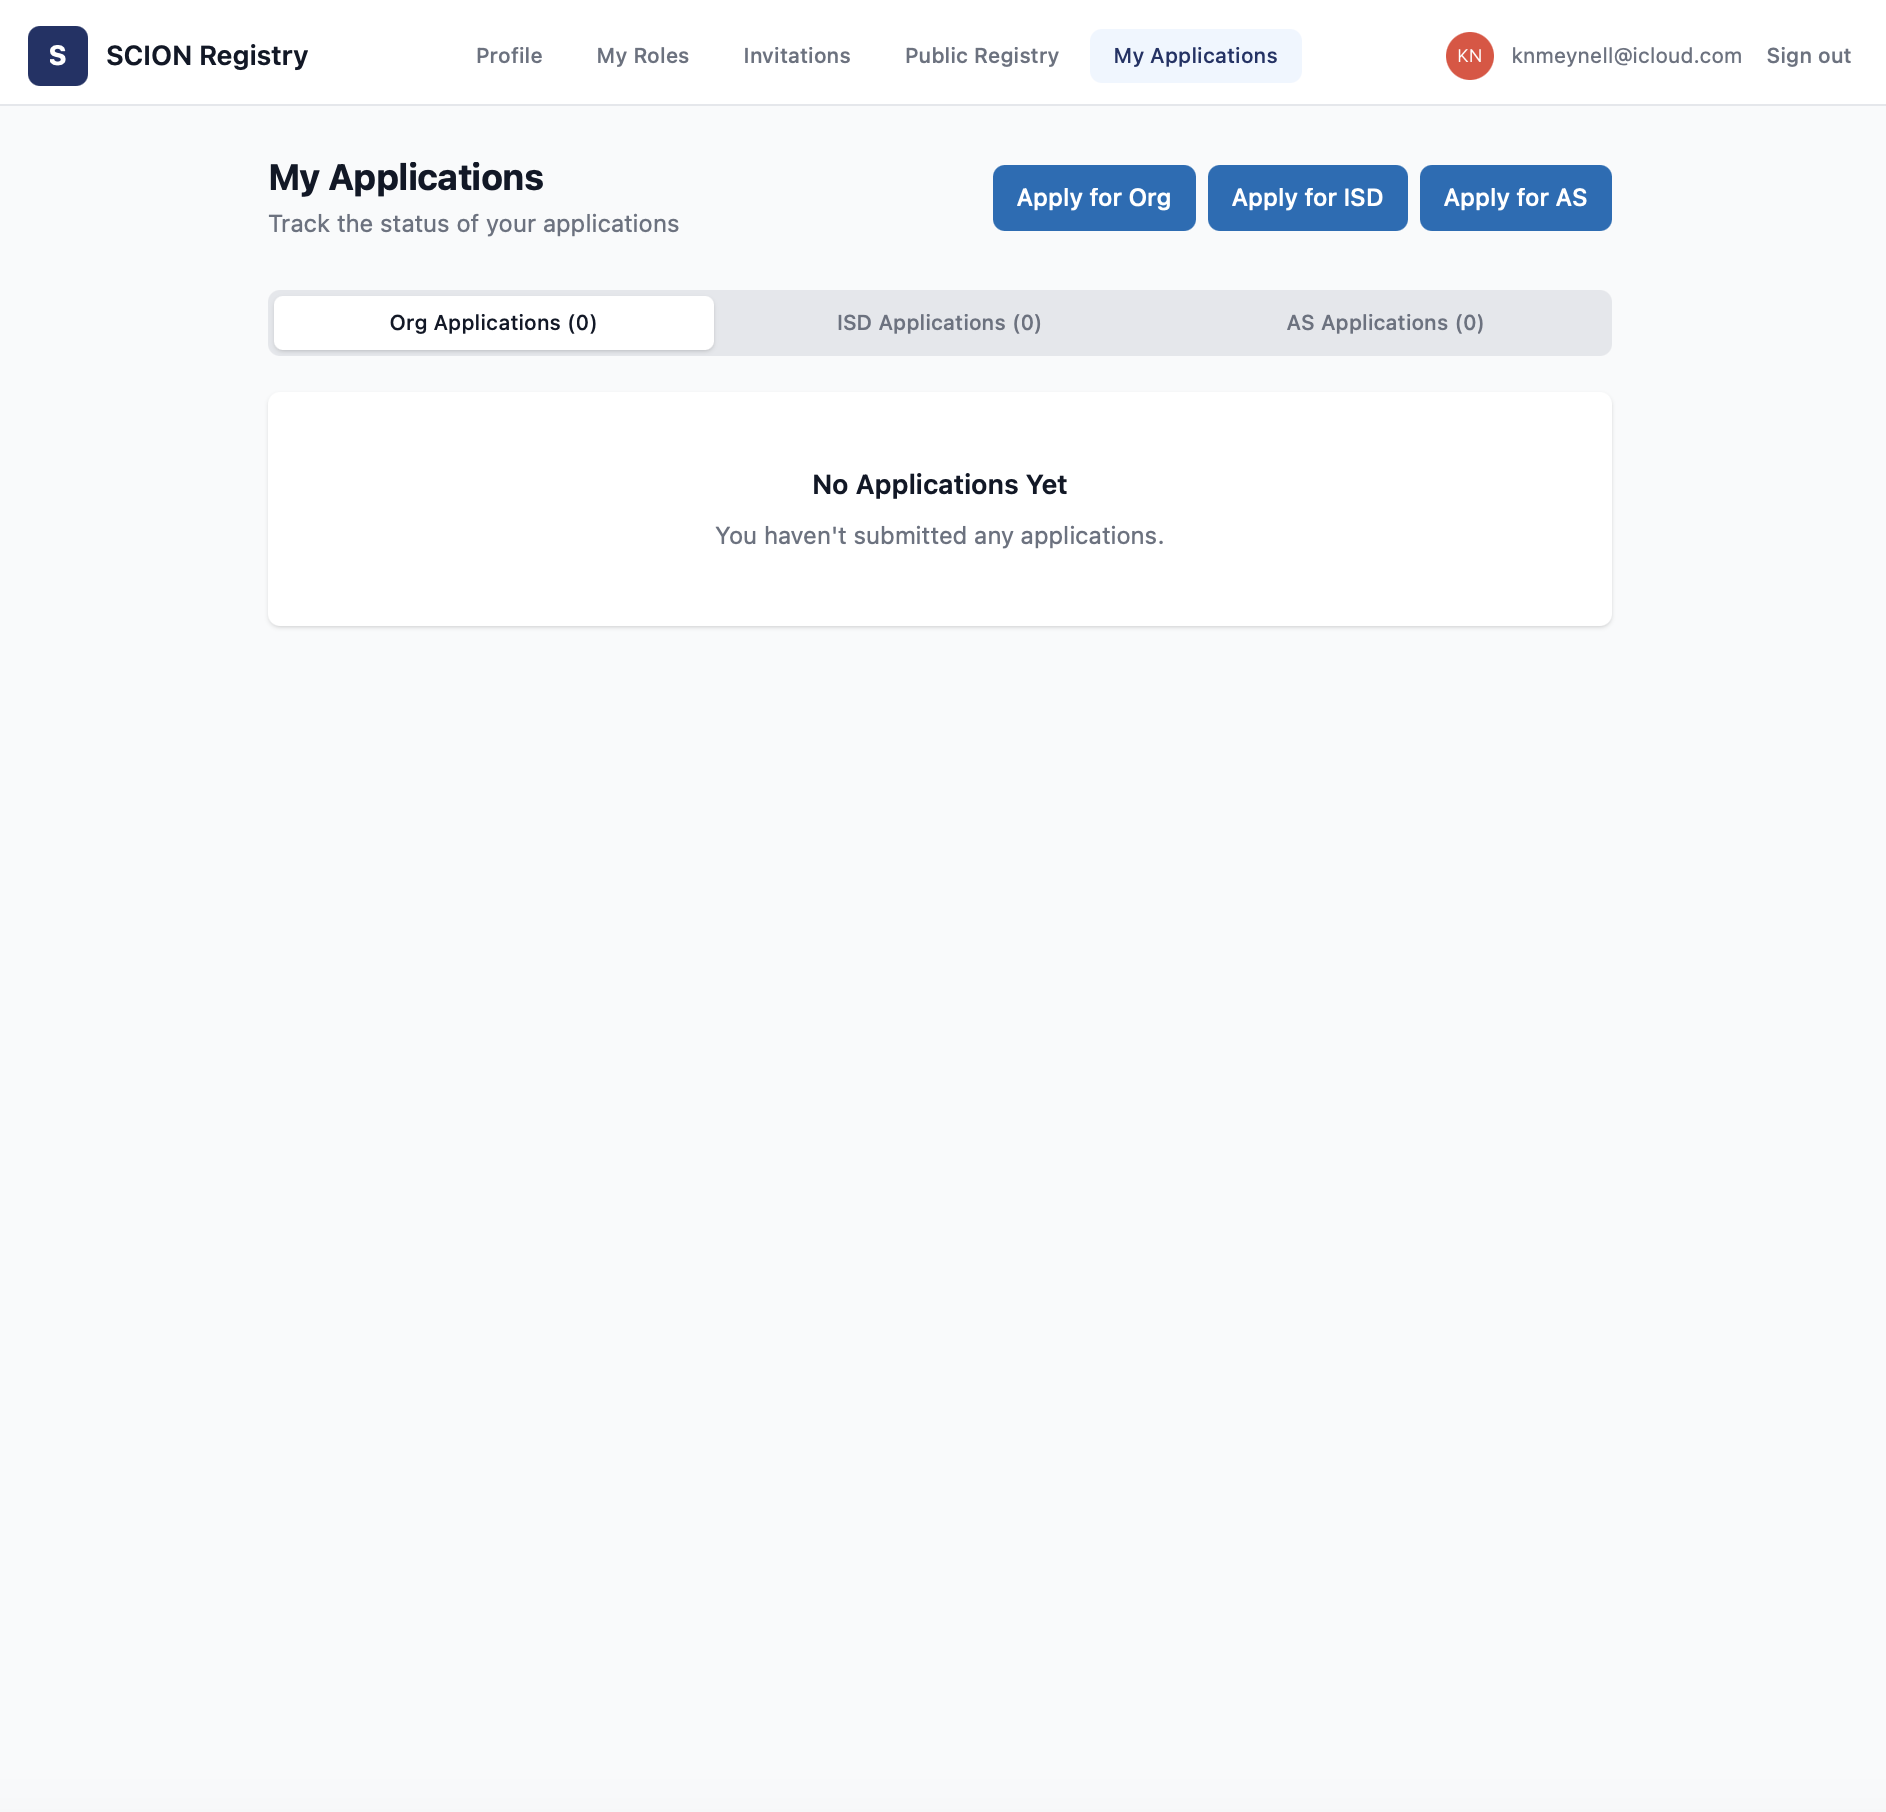
Then click on Apply for Organization to complete and submit your Organization profile. Please note the organization information may be accessible on the public registry website, so it is advisable to use a corporate postal address, telephone number, and email address.
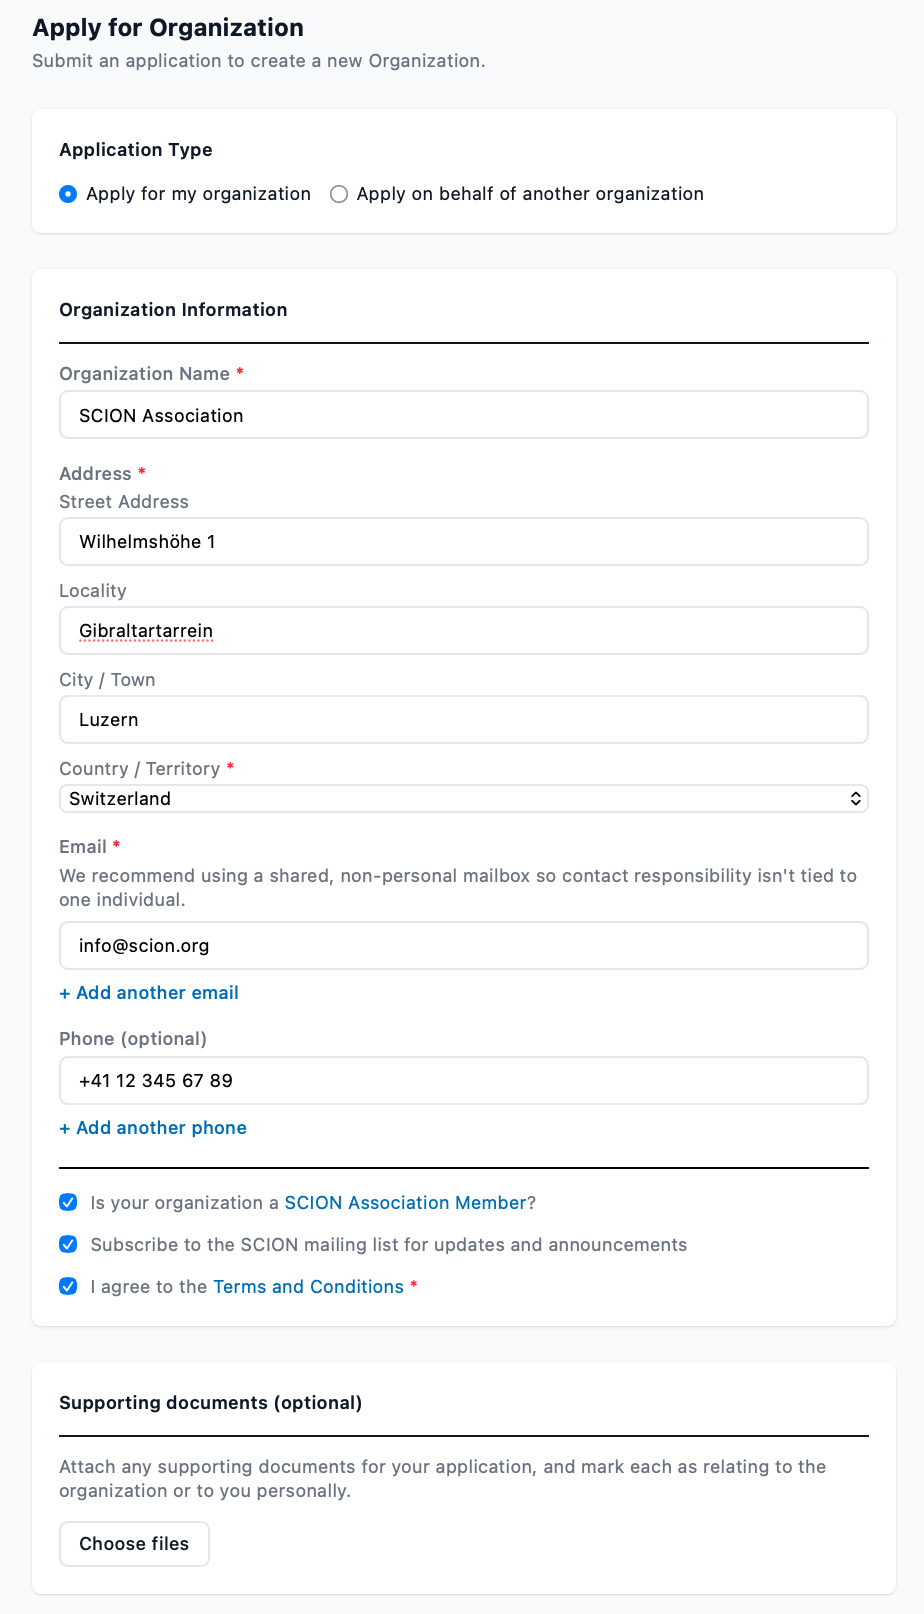
You need to indicate whether your organization is a SCION Association Member, whether you wish to subscribe to the SCION mailing list, and you must agree to the Terms and Conditions.
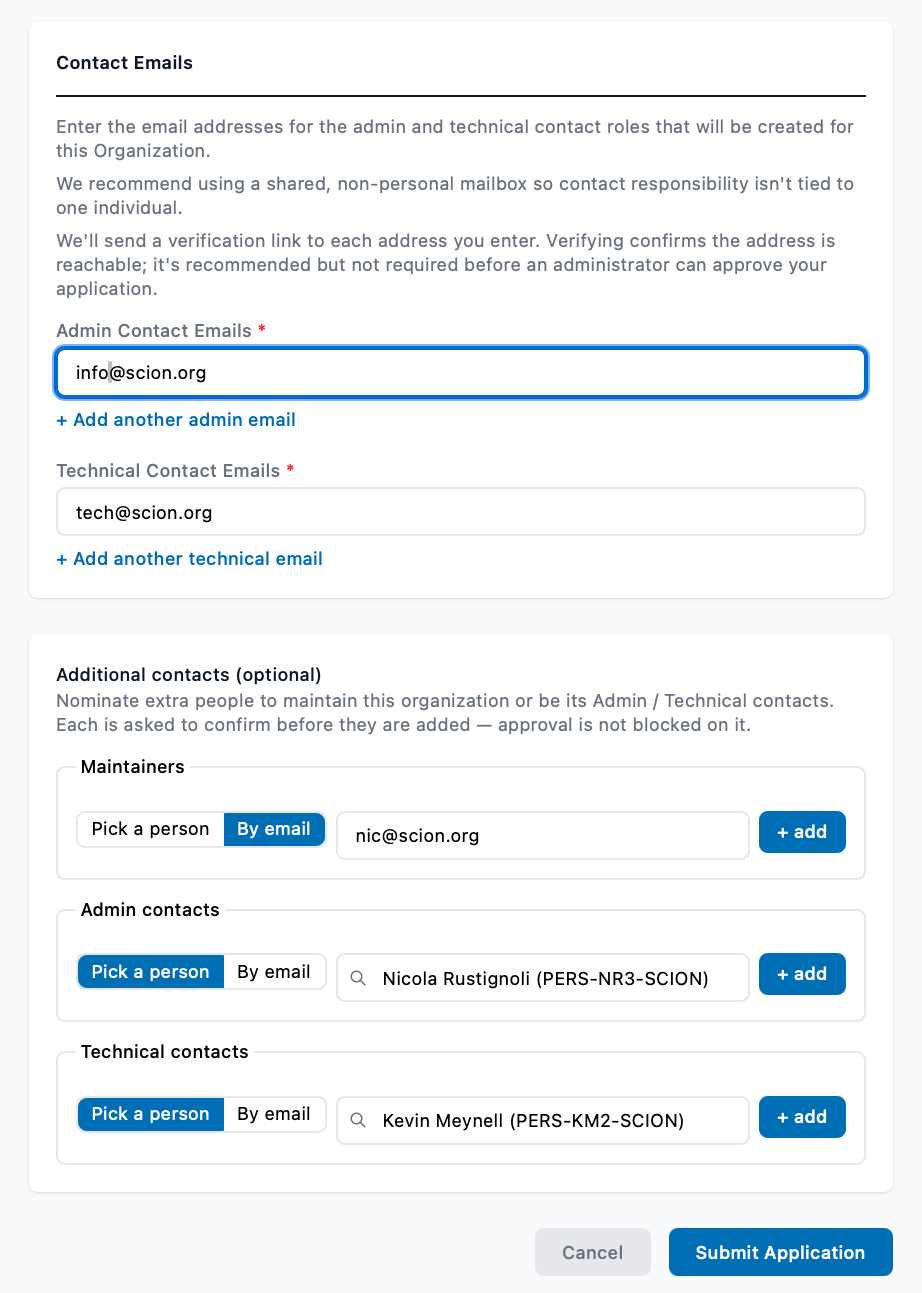
You also need to provide email addresses for the Admin Contact and Technical Contact. The same email address may be used - which may also be the same as the organizational email address - but using a personal email address is not recommended as these addresses are used to create the Admin and Technical roles to which different Personal profiles may be linked.
The person creating the Organization profile will automatically become a Maintainer, Admin Contact and Tech Contact for this, but you can also link additional Personal profiles to each of these roles. You can invite someone to create an account by entering their email address, or if they have already created a Personal profile, by searching for and entering their NIC handle.
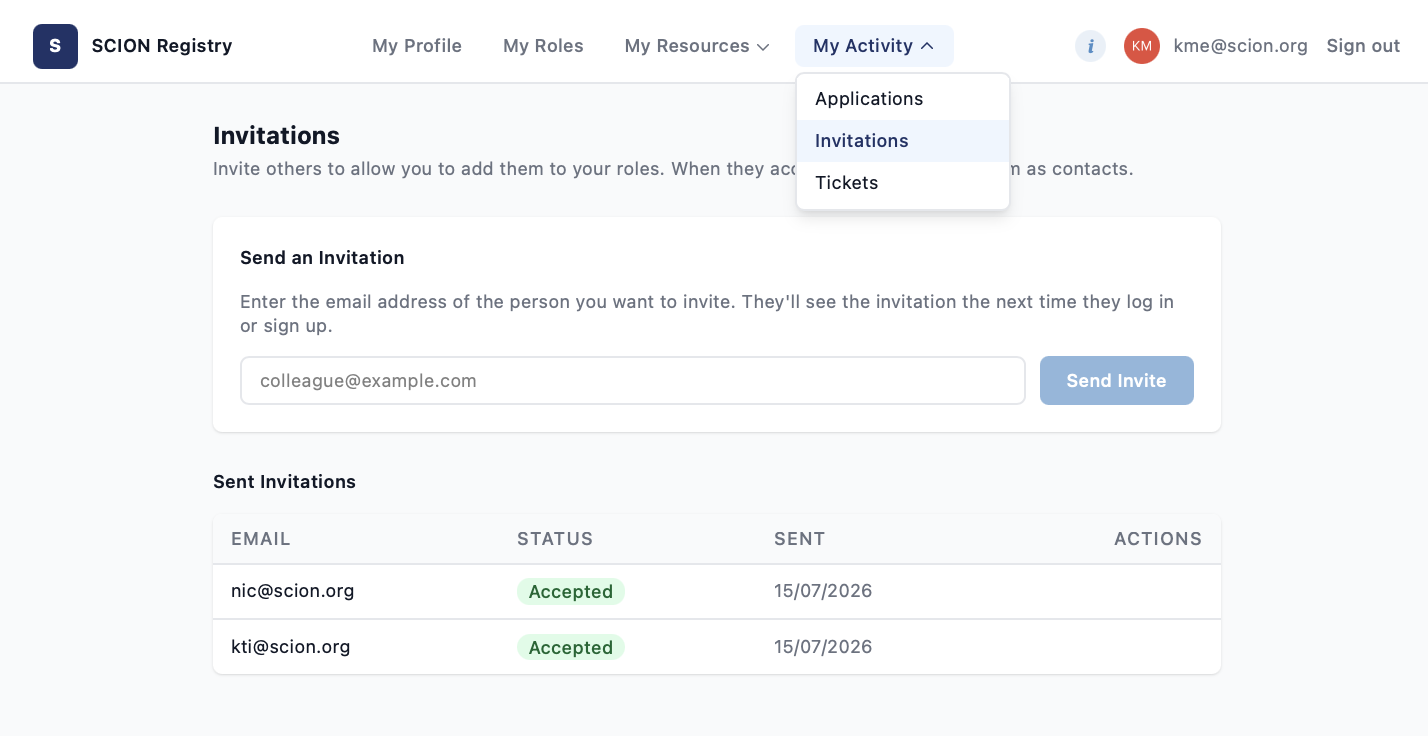
You can also invite additional contacts at any by clicking on My Activity then Invitations in the top menu:
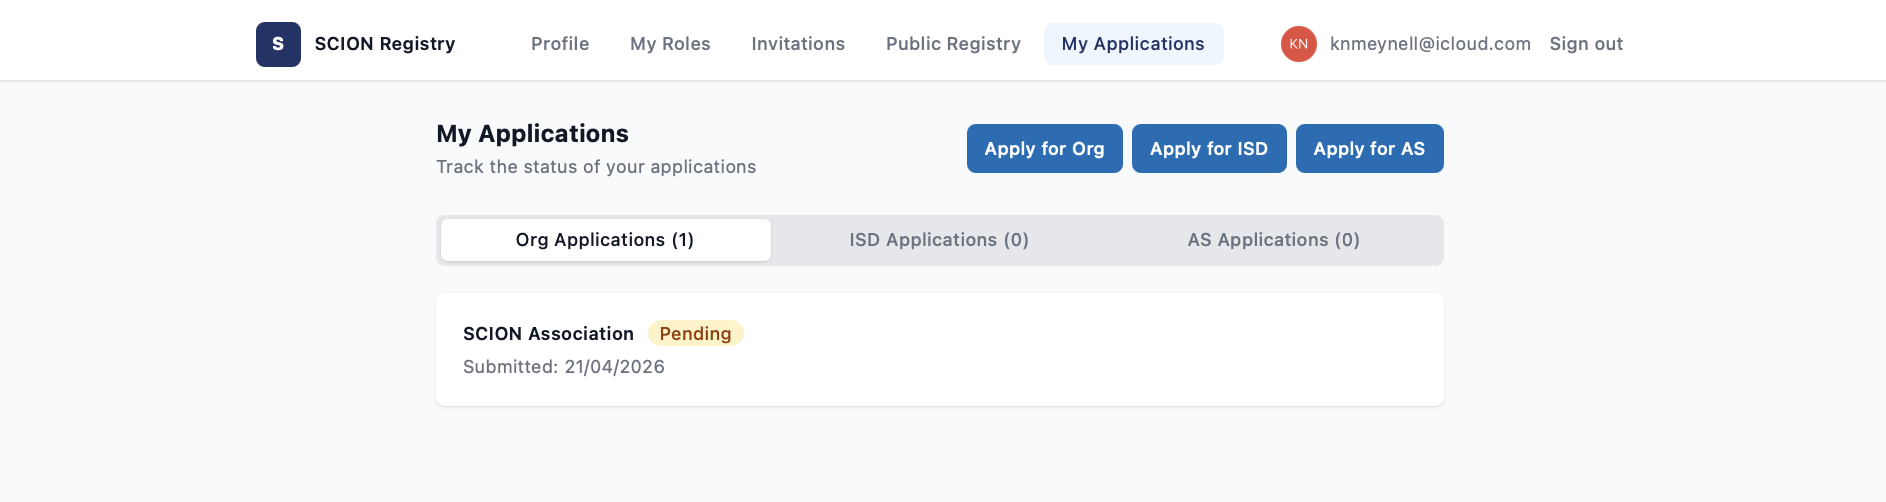
When your Organization profile has been submitted, you will receive a message that this is pending. Organization profiles must be approved upon creation by the SCION Association, which will normally happen within 1-3 working days.
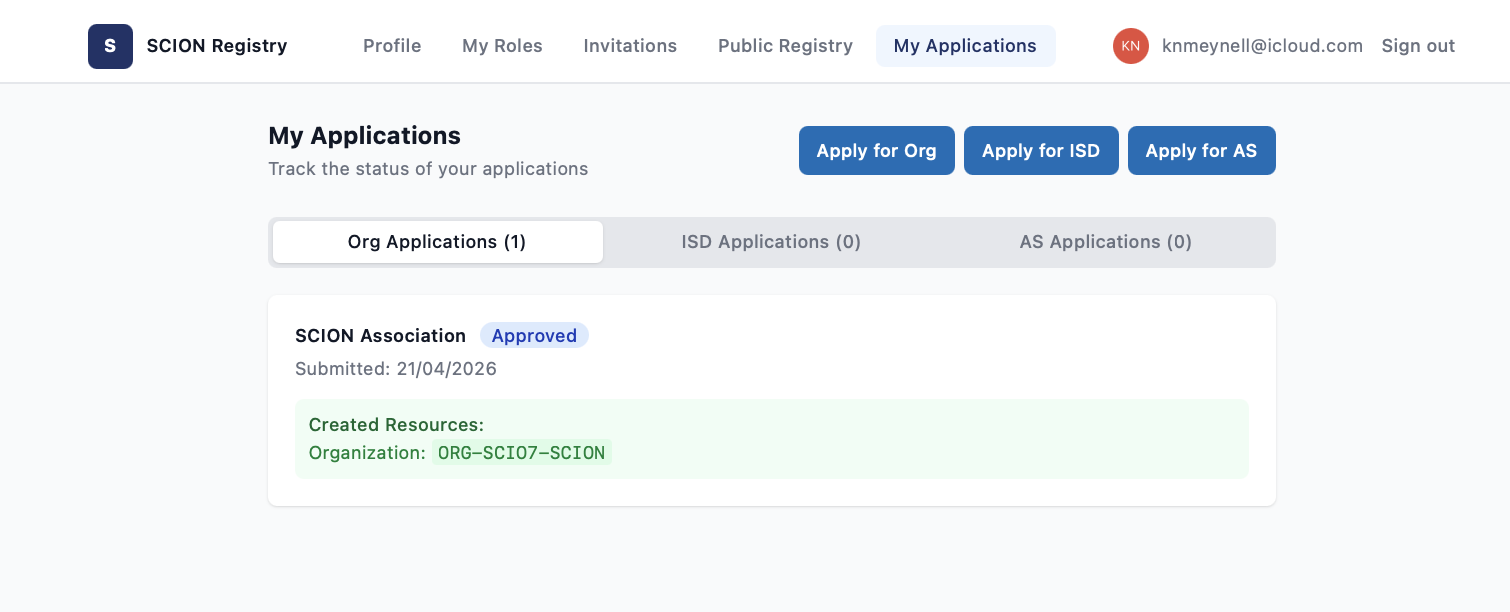
Once your organization’s details have been checked and approved by the SCION Association, you will receive an email notification and your organization application will now show as approved.
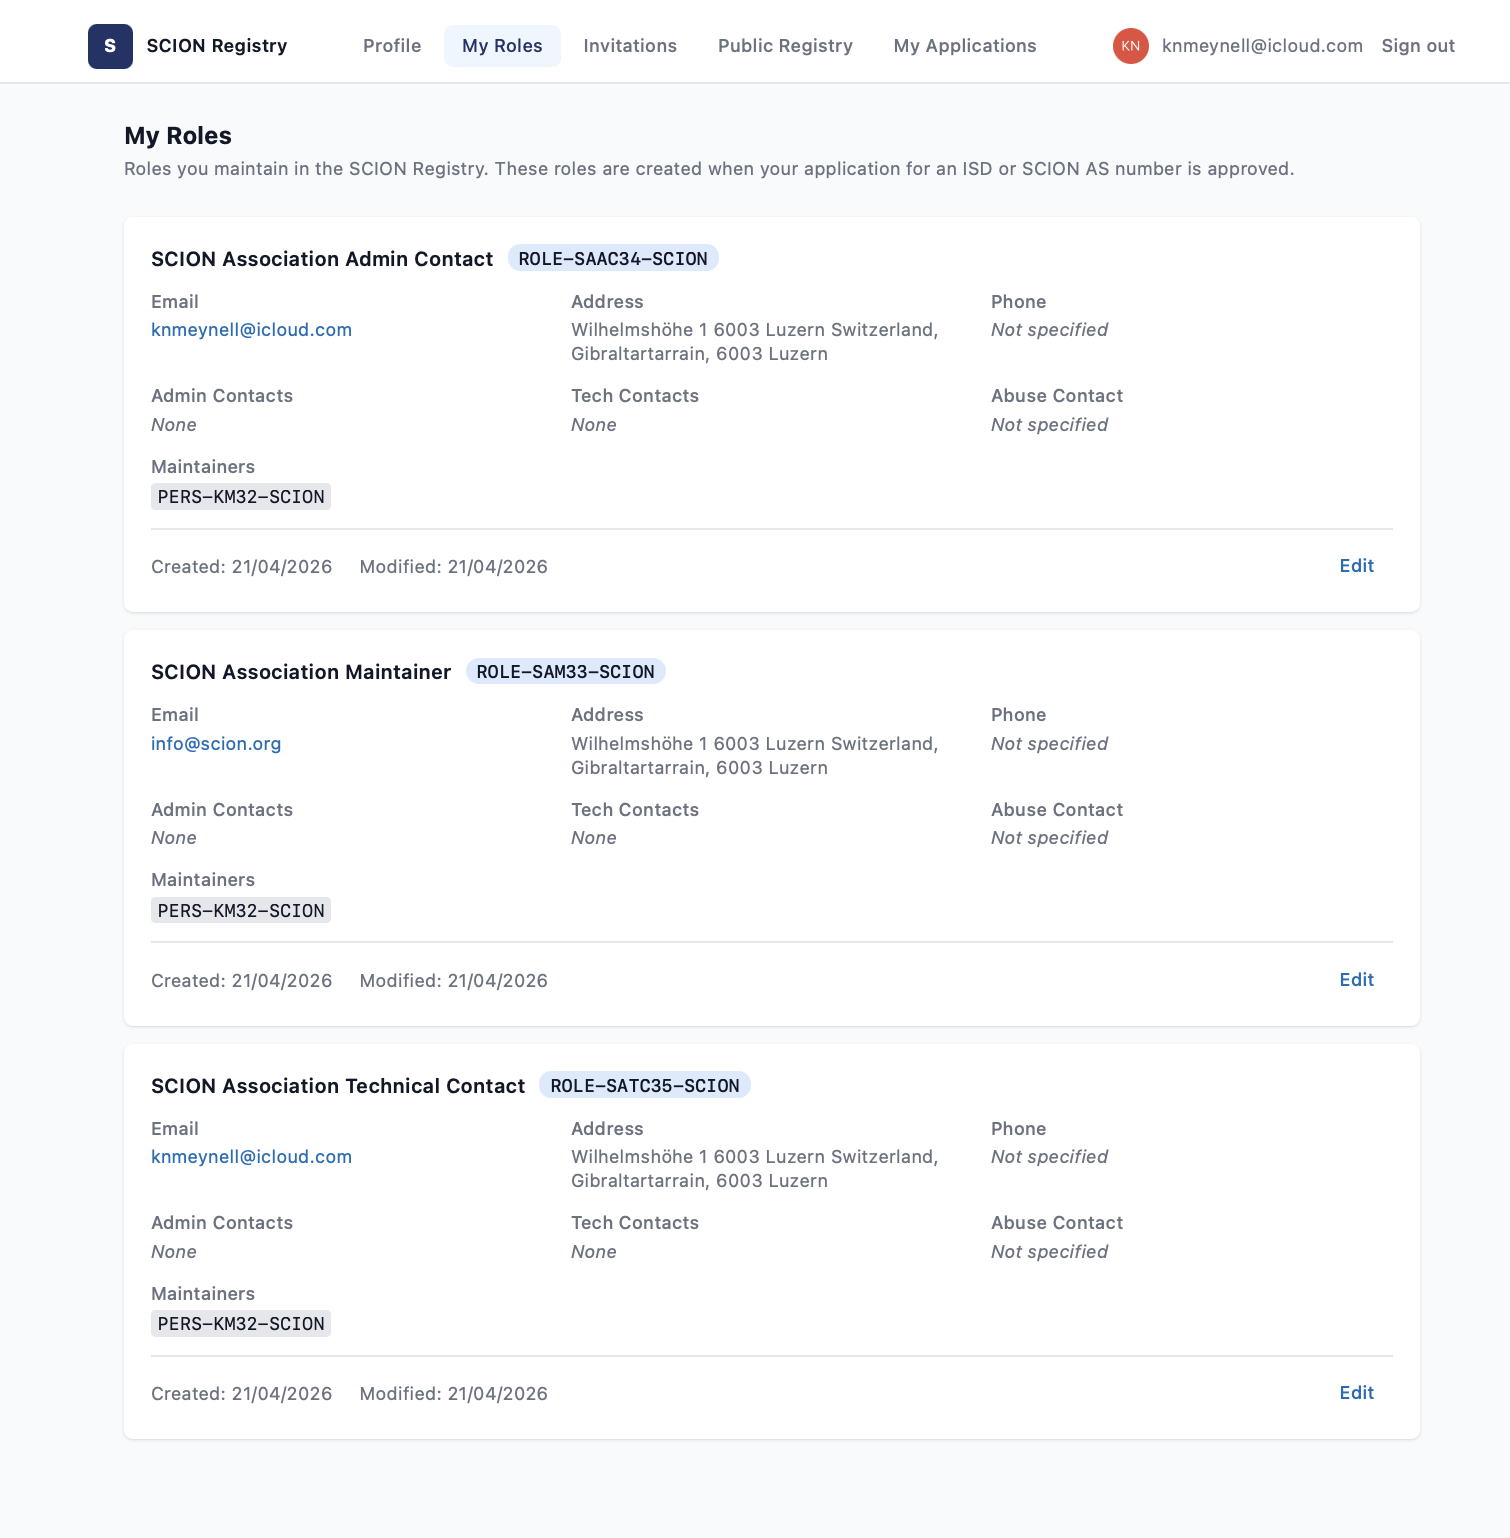
If you click on My Roles in the top menu, you can view the roles (Admin Contact, Technical Contact, and Maintainer) that were automatically created when you created your Organization profile. You may also edit the contact information for these, as well as link additional personal accounts as these are created.
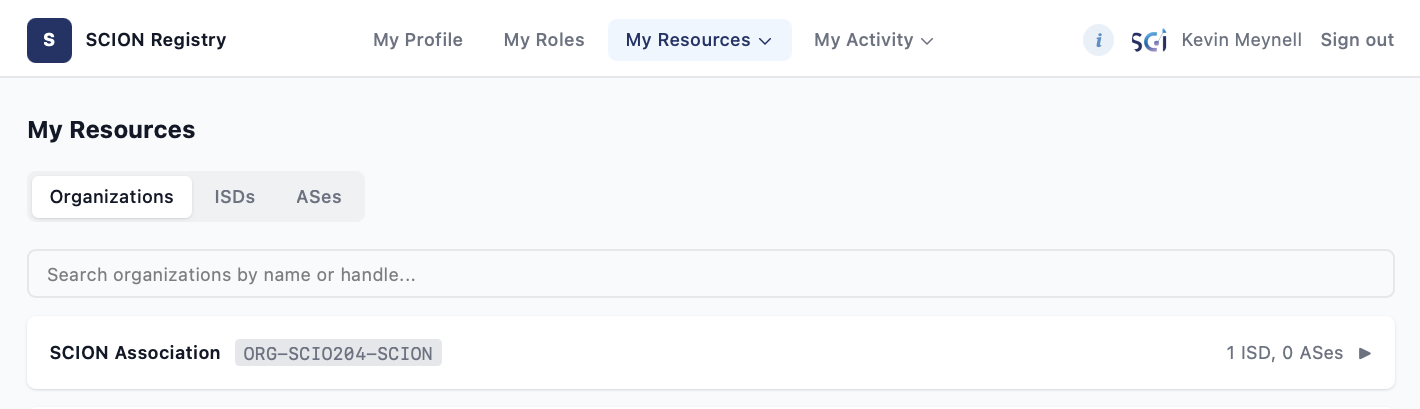
You can further check your Organization(s) by clicking on My Resources then Organizations in the top menu:
Requesting SCION AS numbers
When your organization has been registered in the SCION Registry, you can request SCION AS numbers in accordance with the SCION Registry Policy.
There are two types of SCION AS numbers:
A SCION AS number from the range 1 to 4,294,967,295. If you are the registered holder of a BGP AS number (32-bit) in a Regional Internet Registry, you may request the equivalent SCION AS number. This will be verified by the SCION Association with the appropriate Regional Internet Registry (AFRINIC, APNIC, ARIN, LACNIC and RIPE NCC) database.
SCION AS numbers from the range 2:0:0 to 3:ffff:ffff. The minimum assignment is 16 numbers (4 bits), but 256 numbers (8 bits) or 65,535 numbers (16 bits) may be requested with a valid use case.
Please note that assignments incur fees upon approval (starting from 1 January 2027), with larger blocks incurring larger fees, in accordance with the published SCION Registry charges.
Step 1:
To apply for a SCION AS number, click on My Activity then Applications in the top menu:
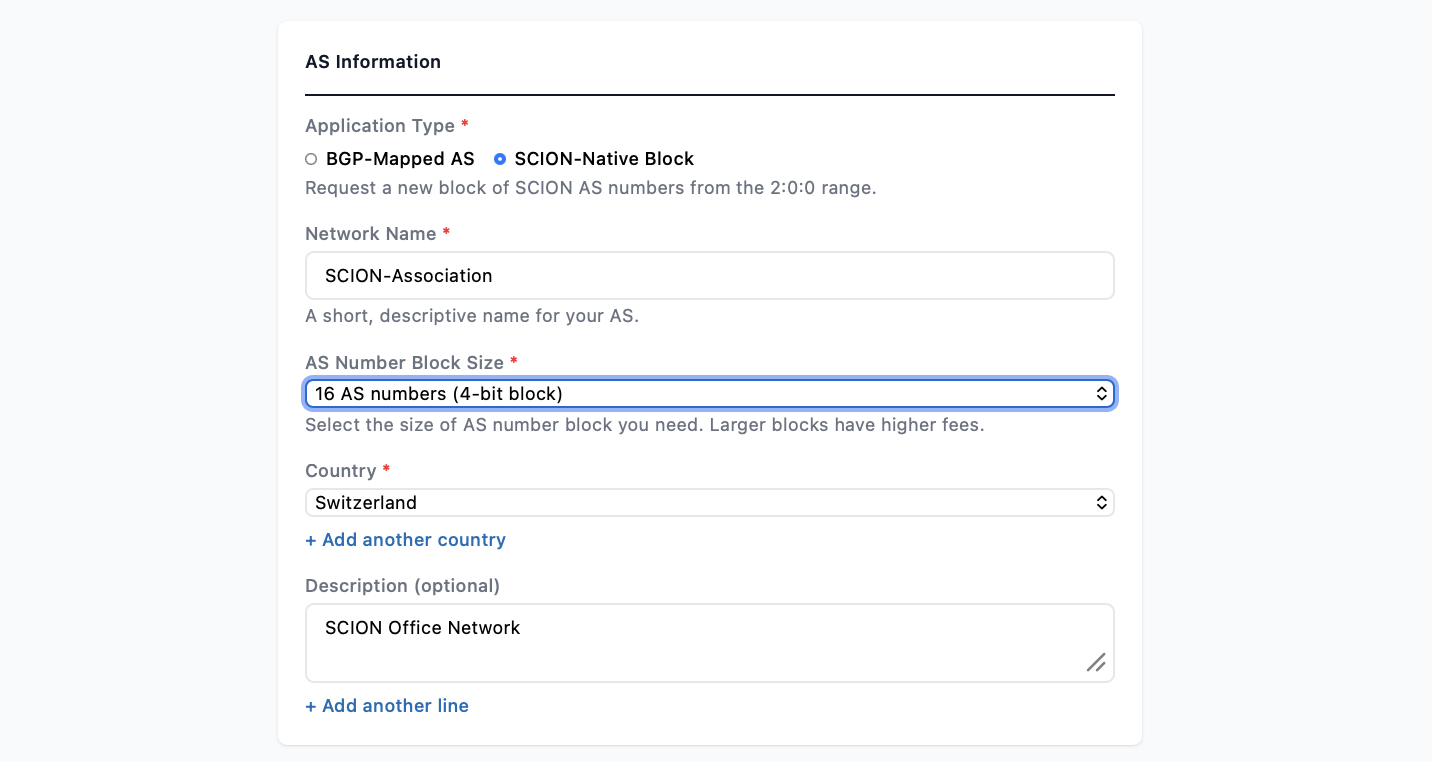
Then click on Apply for AS and complete the request form:
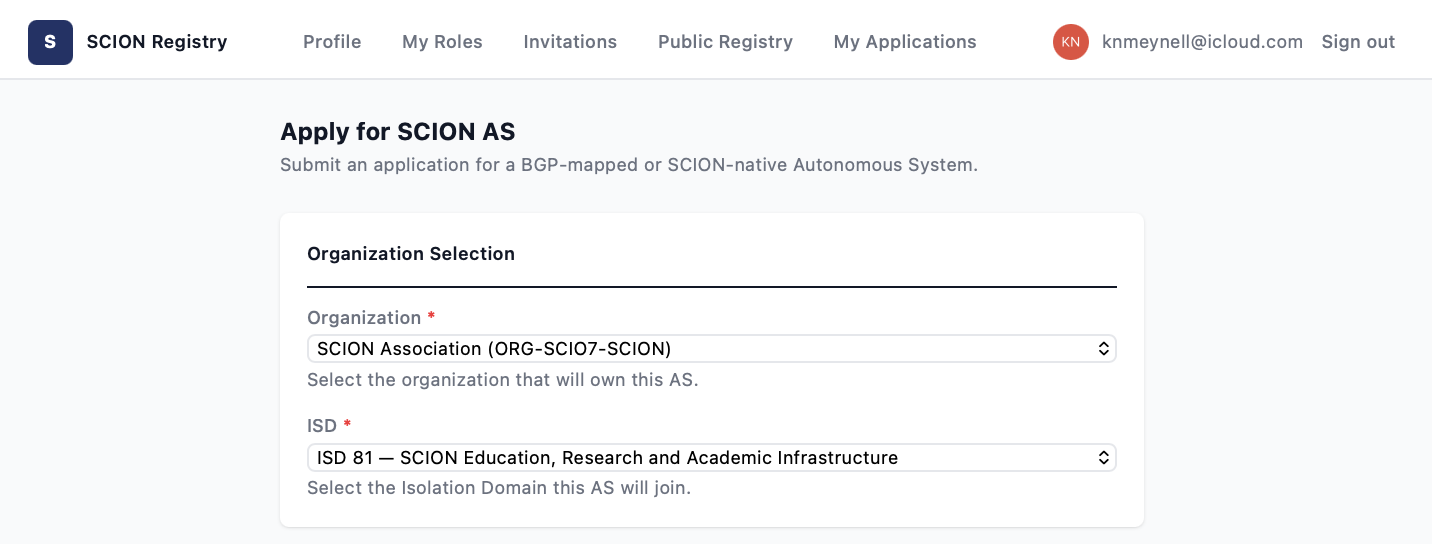
Step 2:
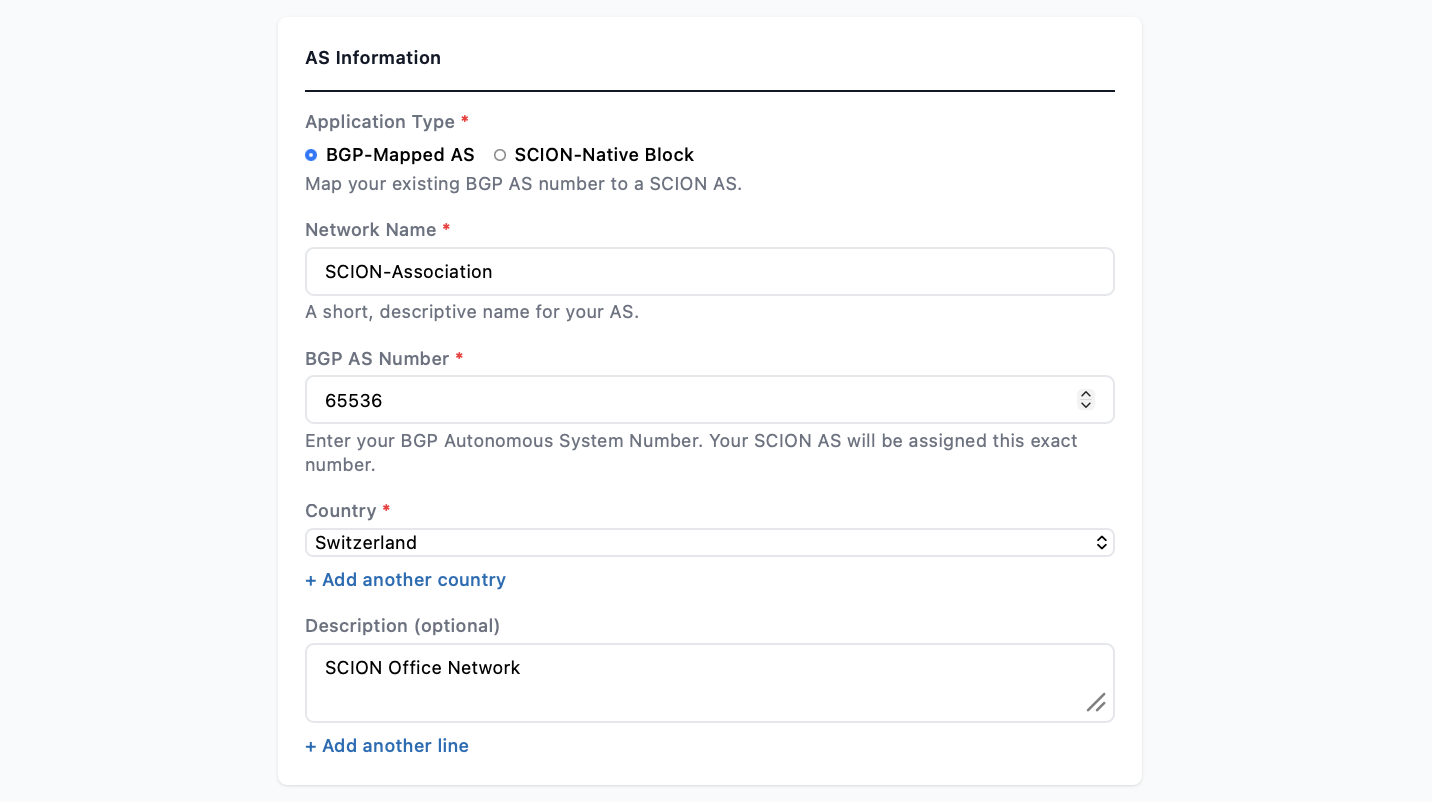
If you are requesting a BGP-mapped SCION AS number, please select BGP-mapped AS and fill in the BGP AS number you were assigned by a Regional Internet Registry:
If you are requesting a block of SCION AS numbers, please select SCION-Native Block and the size of the block you are requesting:
Step 3:
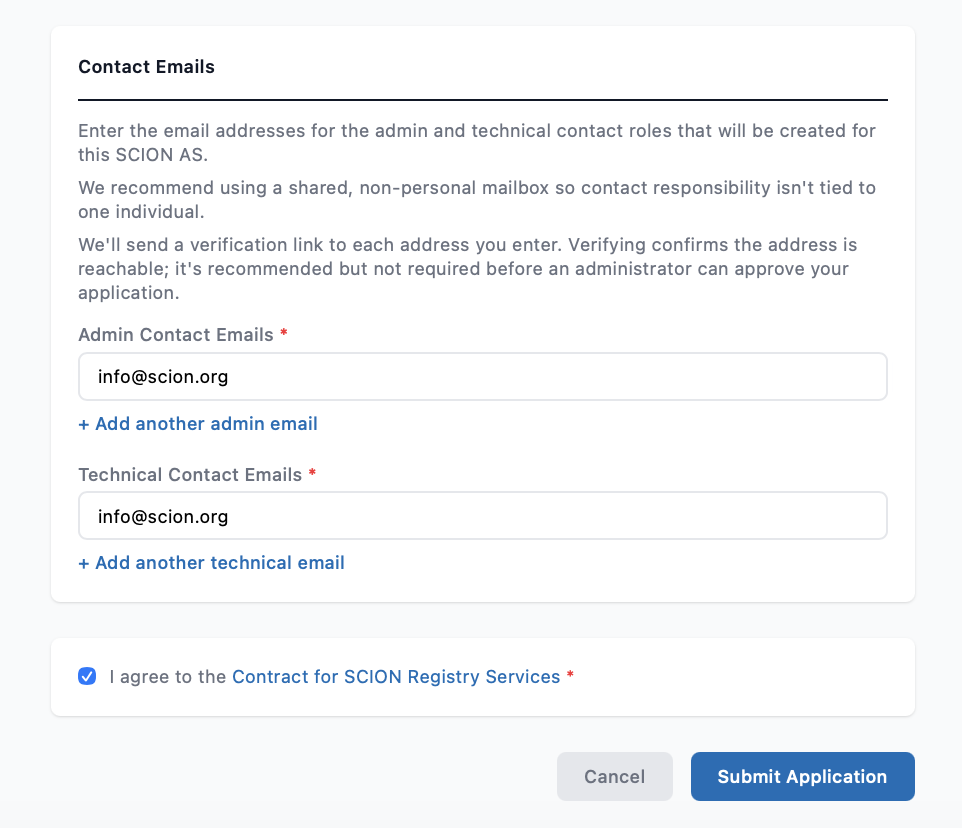
The remaining step is to assign the Admin Contacts and Technical Contacts. You must agree to the Contract for SCION Registry Services:
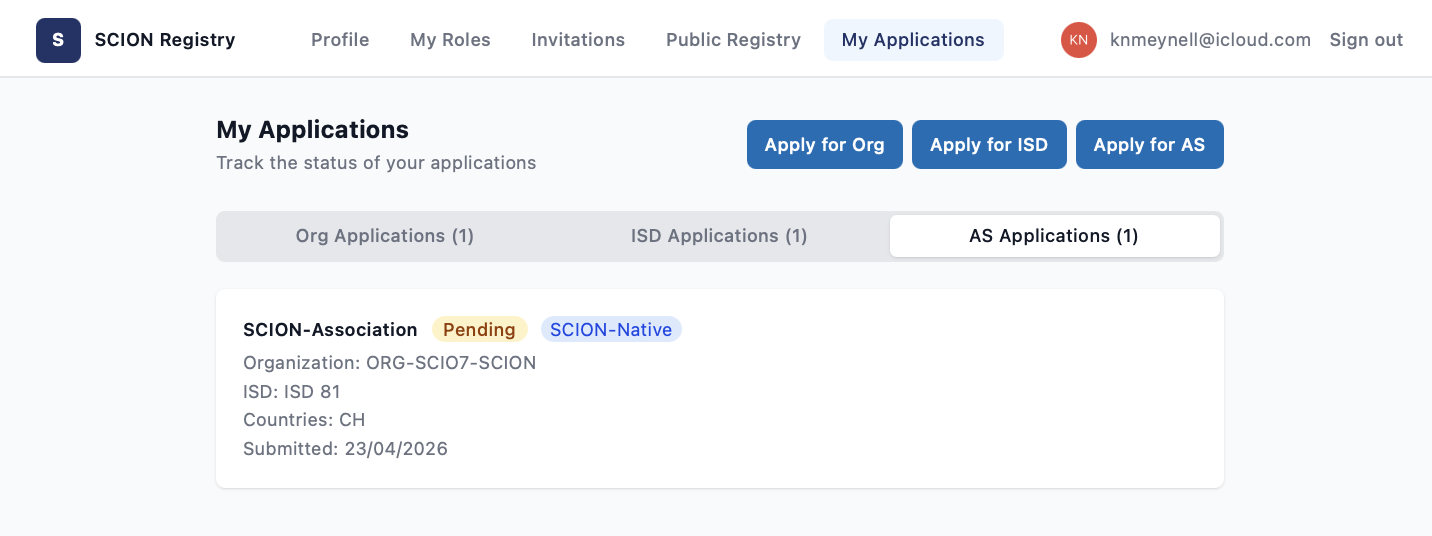
When your SCION AS number application has been submitted, you will receive a message that this is pending. Applications must be approved by the SCION Association, which will normally happen within 1-3 working days.
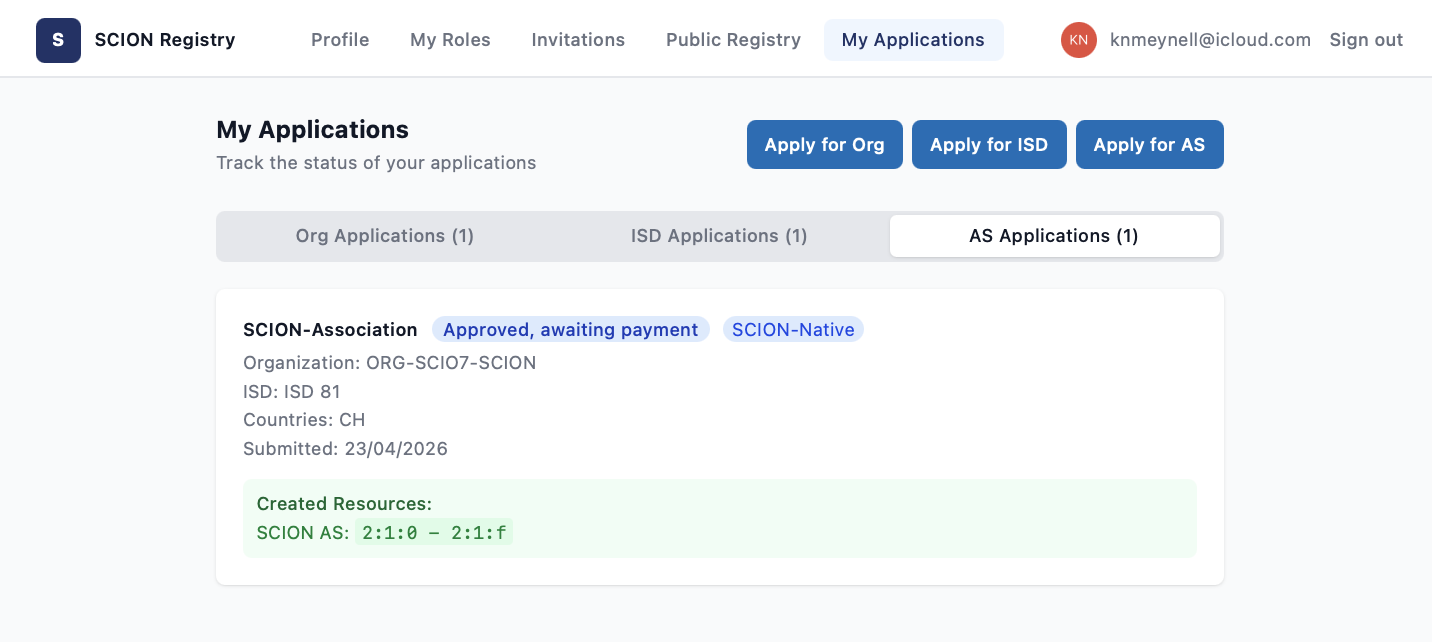
Once your SCION AS number application has been checked and approved by the SCION Association, you will receive an email notification and your application will now show as Approved, awaiting payment if payment is due.
Once payment has been received by the SCION Association, or if no payment is due, then your application will show as Approved.
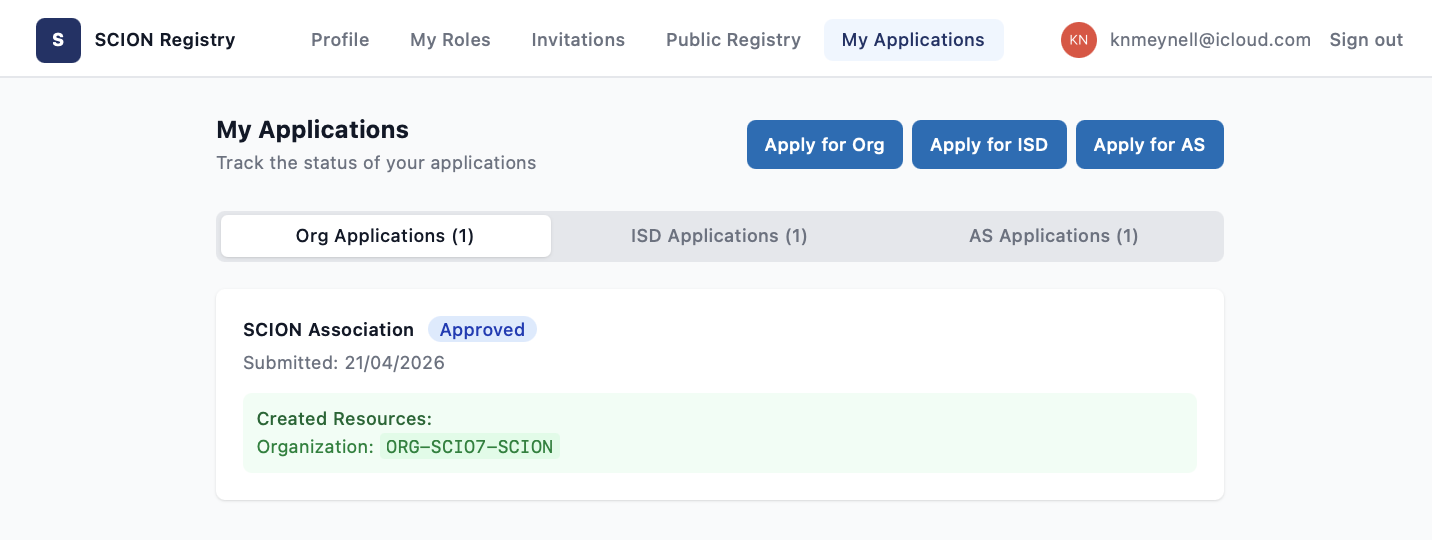
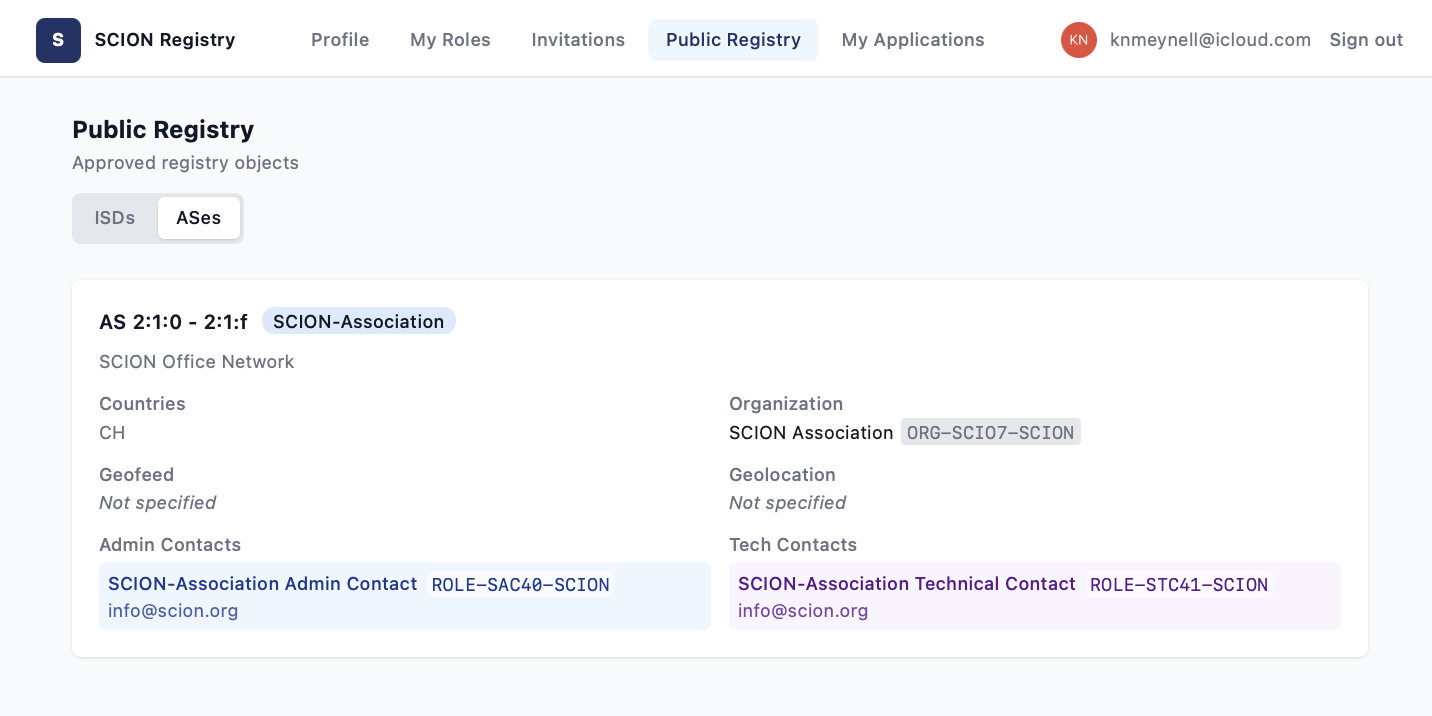
You can further check your SCION AS number assignments by clicking on My Resources then SCION AS numbers in the top menu:
Requesting ISD numbers
An ISD number is used to identify a group of SCION ASes that share a common purpose and trust policy (e.g. Secure Swiss Finance Network). An ISD is usually set-up and operated by a small number of SCION ASes within the group known as Voting Members, and only one of these needs to apply for and register an ISD number.
However, if your organization is a Voting Member of an ISD and is designated to be the holder of the ISD number required to identify it, you can also use the SCION Registry portal to apply for one in accordance with the SCION Registry Policy.
To apply for an ISD number, click on My Activity then Applications in the top menu:
Then click on Apply for ISD and complete the request form:
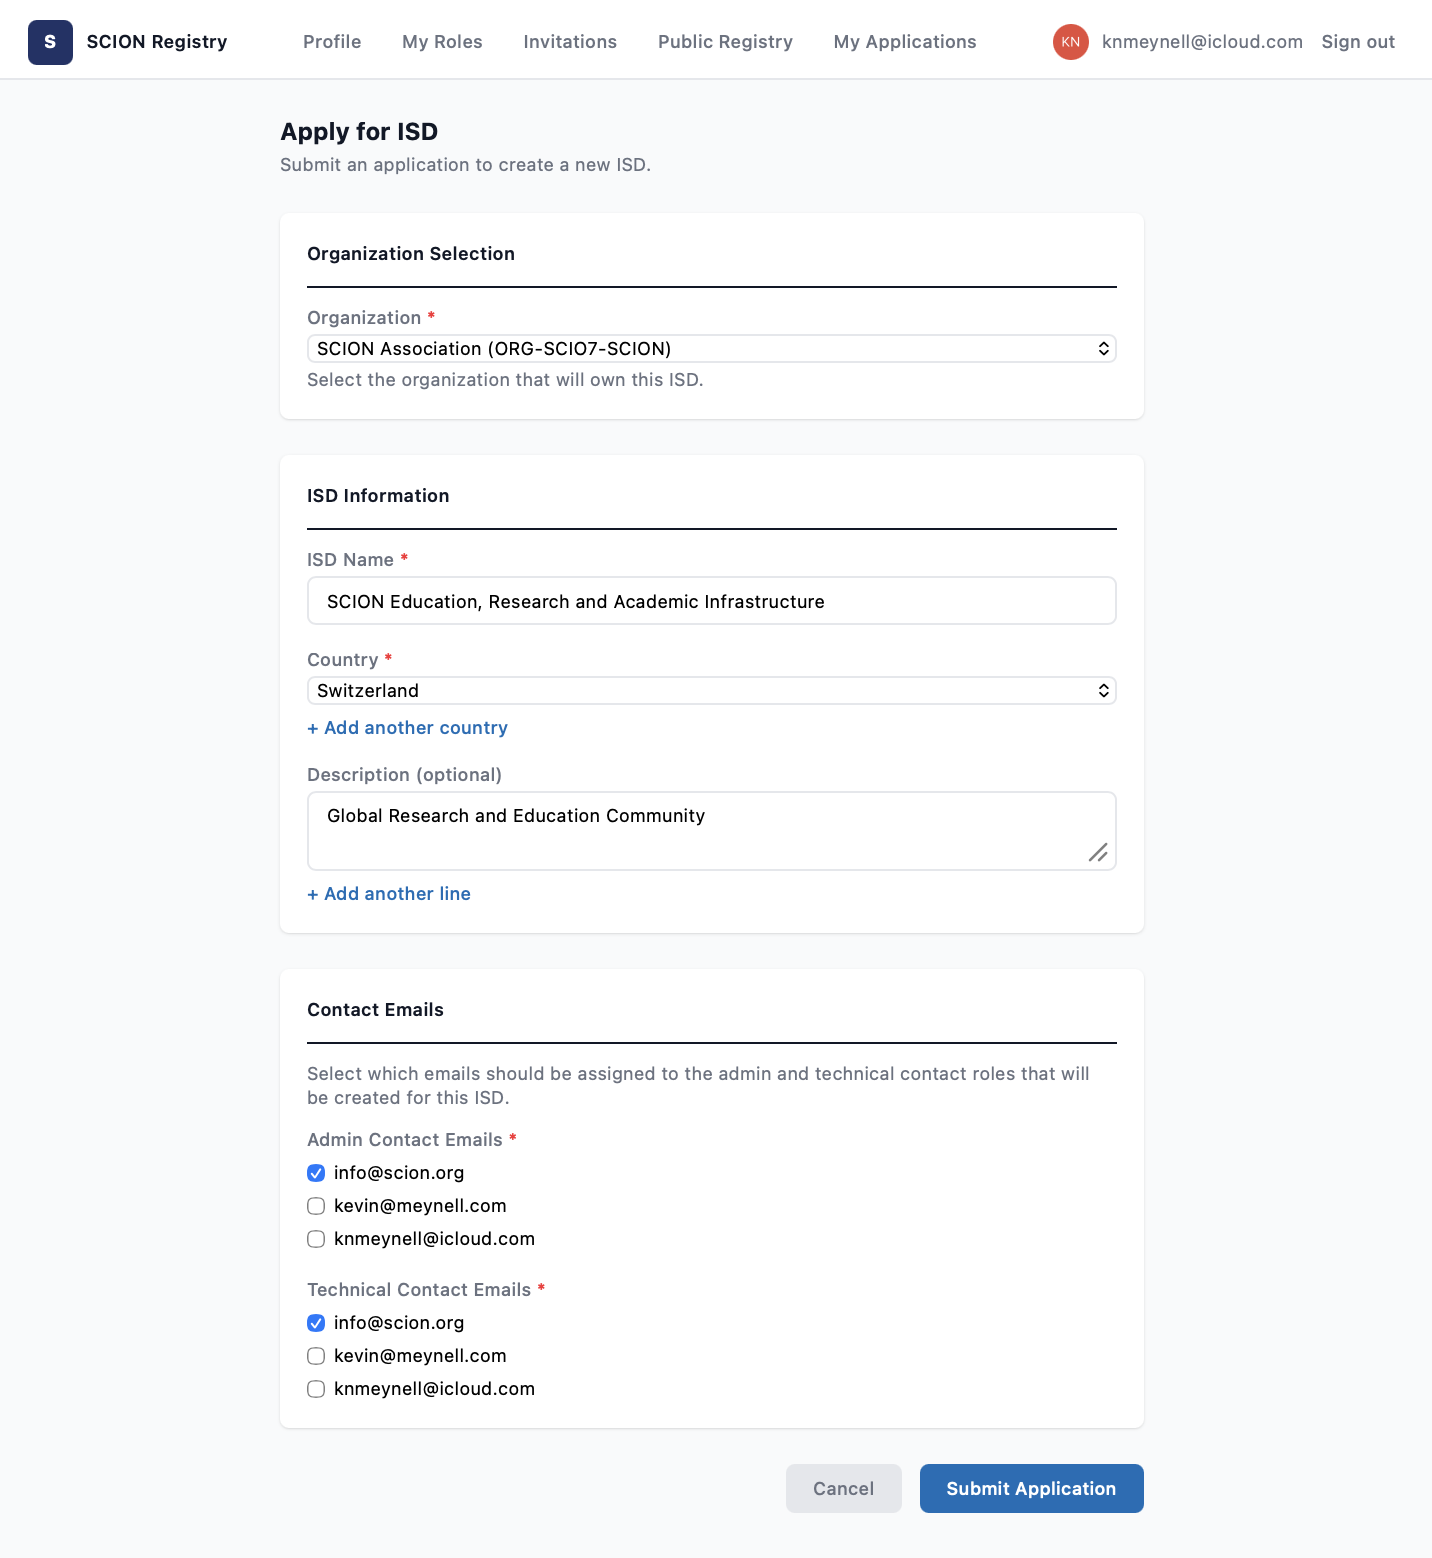
The ISD’s Trusted Root Configuration (TRC) can also be referenced as a link or uploaded to the registry.
The remaining step is to assign the Admin Contacts and Technical Contacts. You must also agree to the Contract for SCION Registry Services:
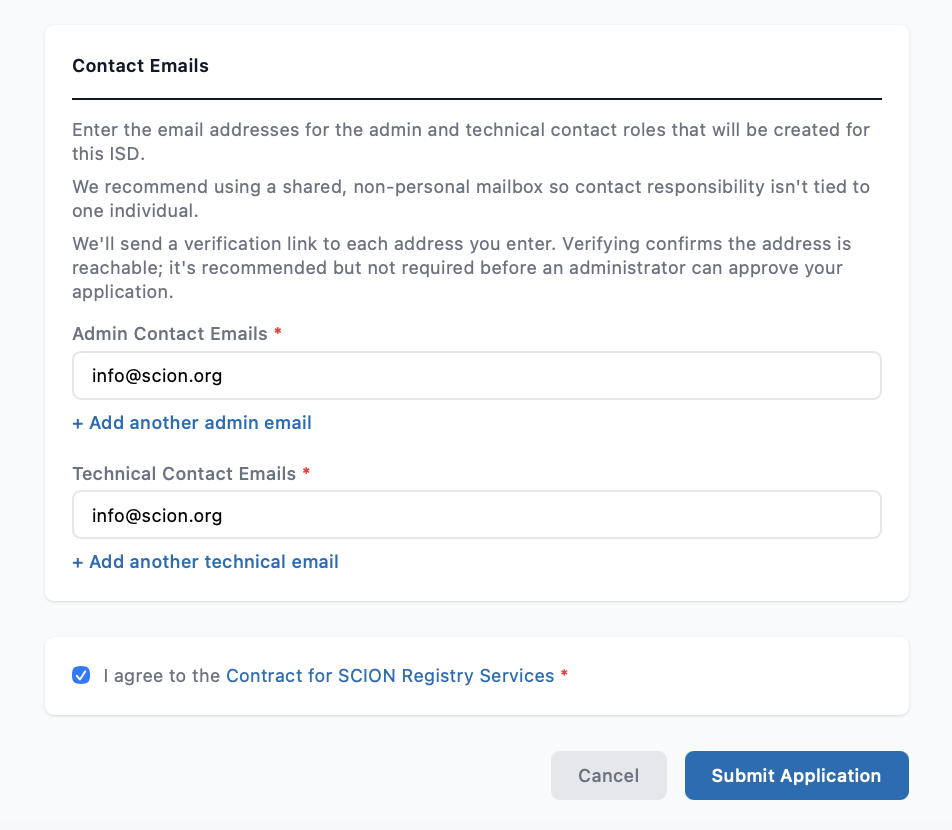
When your ISD number application has been submitted, you will receive a message that this is pending. Applications must be approved by the SCION Association, which will normally happen within 1-3 working days.
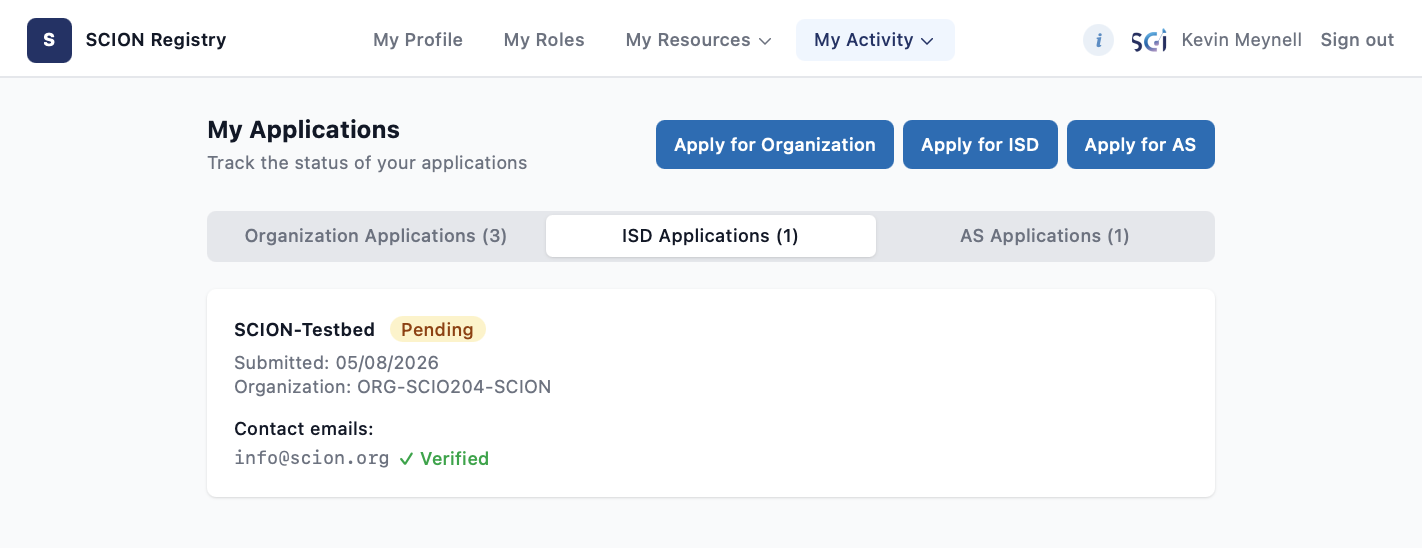
Once your ISD number application has been checked and approved by the SCION Association, you will receive an email notification and your application will now show as Approved, awaiting payment if payment is due.
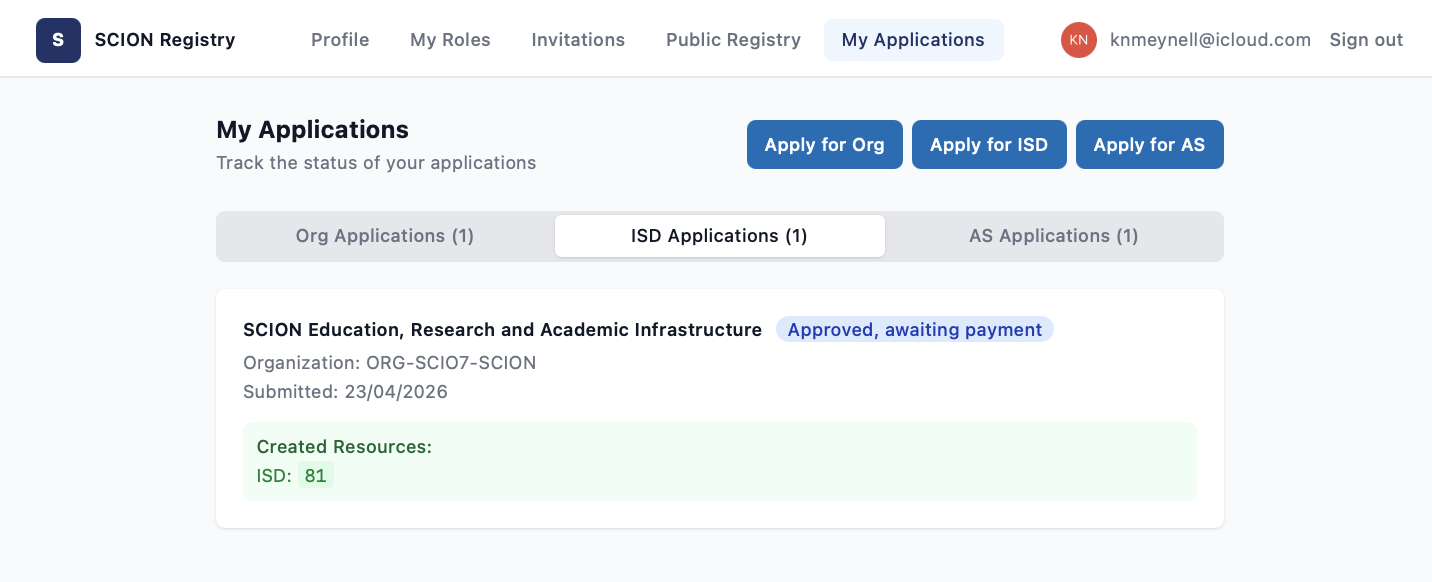
Once payment has been received by the SCION Association, or if no payment is due, then your application will show as ‘Approved’.
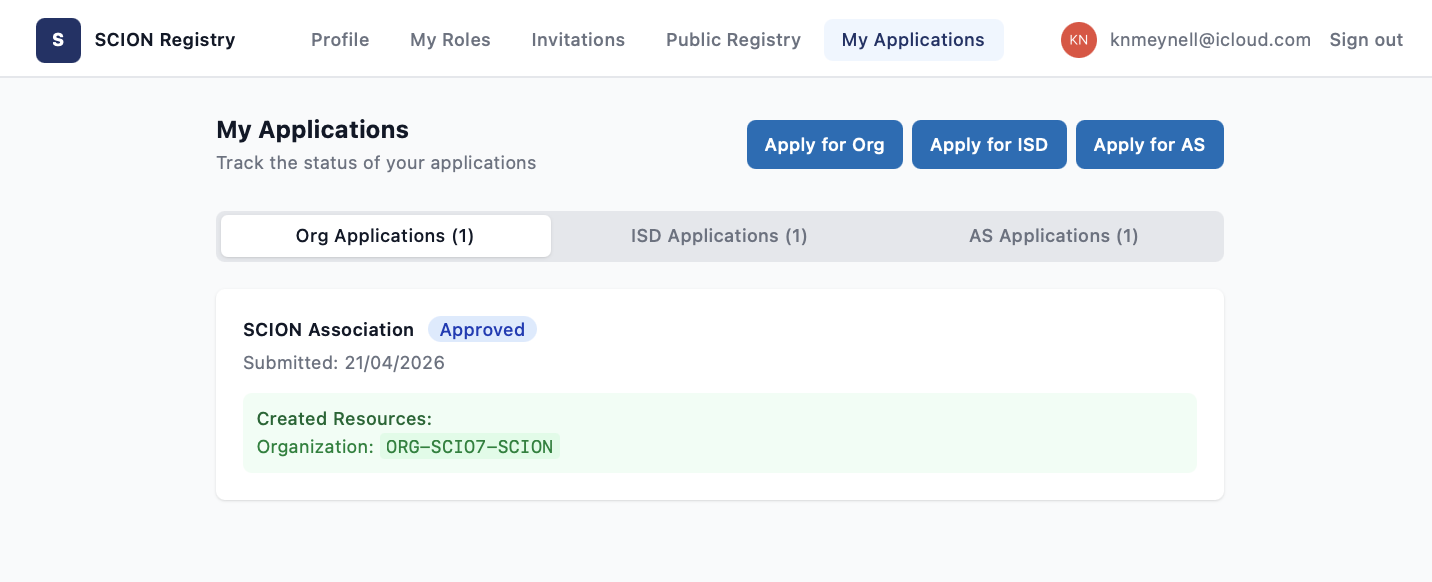
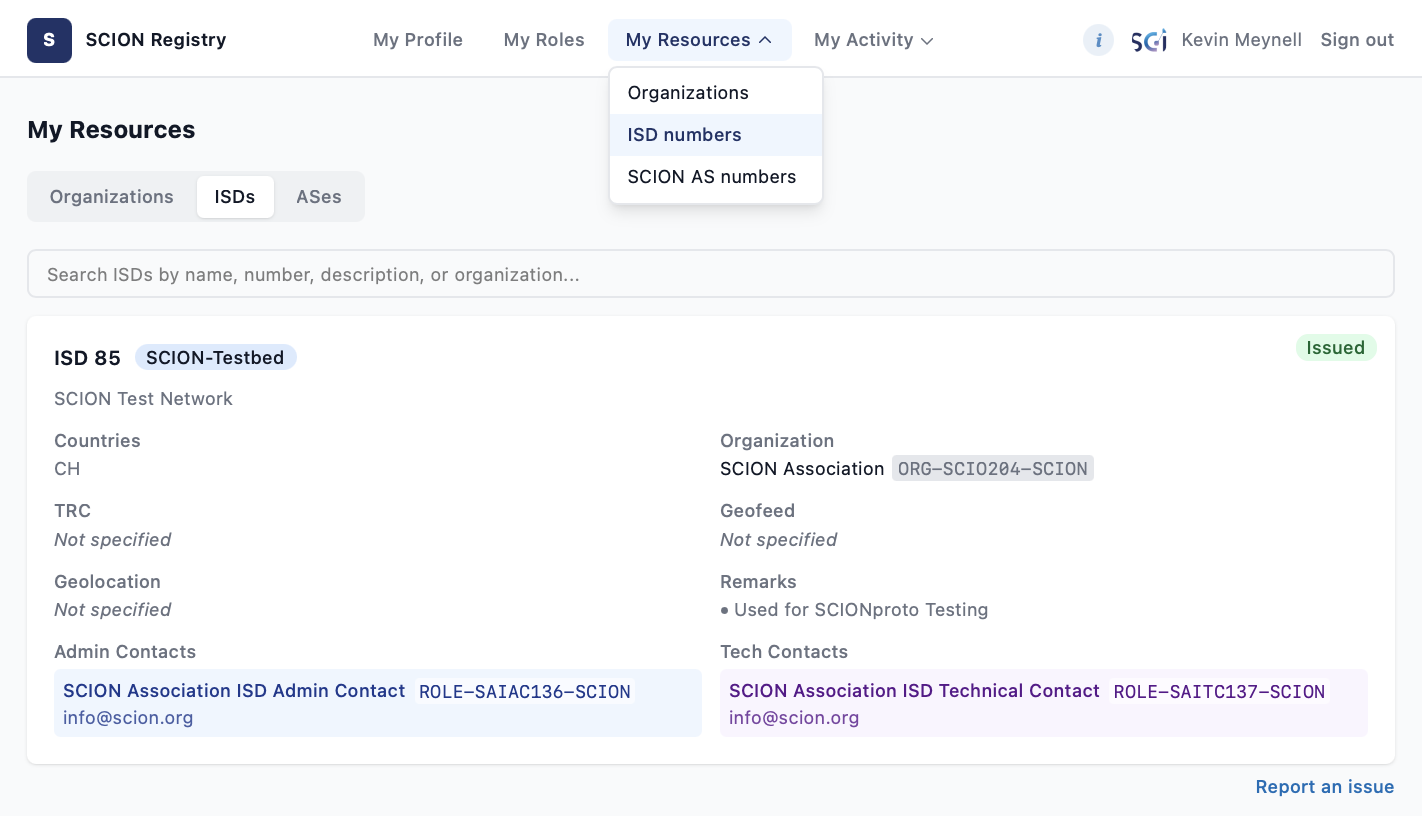
You can further check your ISD number assignments by clicking on My Resources then ISD numbers in the top menu: